> ## Documentation Index
> Fetch the complete documentation index at: https://semantiks.mintlify.site/llms.txt
> Use this file to discover all available pages before exploring further.
# How to Integrate with Freshchat
> Step-by-step guide to connect your Semantiks AI agent with Freshchat.
This integration connects Freshchat (the messaging platform from Freshworks) with a Semantiks conversational agent. Messages sent by users through Freshchat will be automatically managed by our AI agent as the first line of support. If you have escalation enabled, users can be transferred to your human team in Freshchat when necessary.
## Quick Summary of the Steps
Integrating Freshchat with Semantiks is simple and fast. Just follow four basic steps to connect both systems and start managing your conversations automatically.
1. Get the **App ID** from the Freshchat web widget settings.
2. Go to the integrations section to obtain your **API Key** and **Base URL** for your account.
3. Next, configure the **Webhook** and copy the **Public Key** provided by Freshchat to secure the communication.
4. Finally, enter these details in the Semantiks console and activate the channel.
That's it! In just a few minutes, your AI agent will be ready to respond to your users in Freshchat.
***
The App ID is a unique identifier for your Freshchat configuration. You can find it in the integration settings of the web widget.
**Steps:**
1. Log in to your Freshchat console.
2. In the left sidebar, click on Admin Settings.
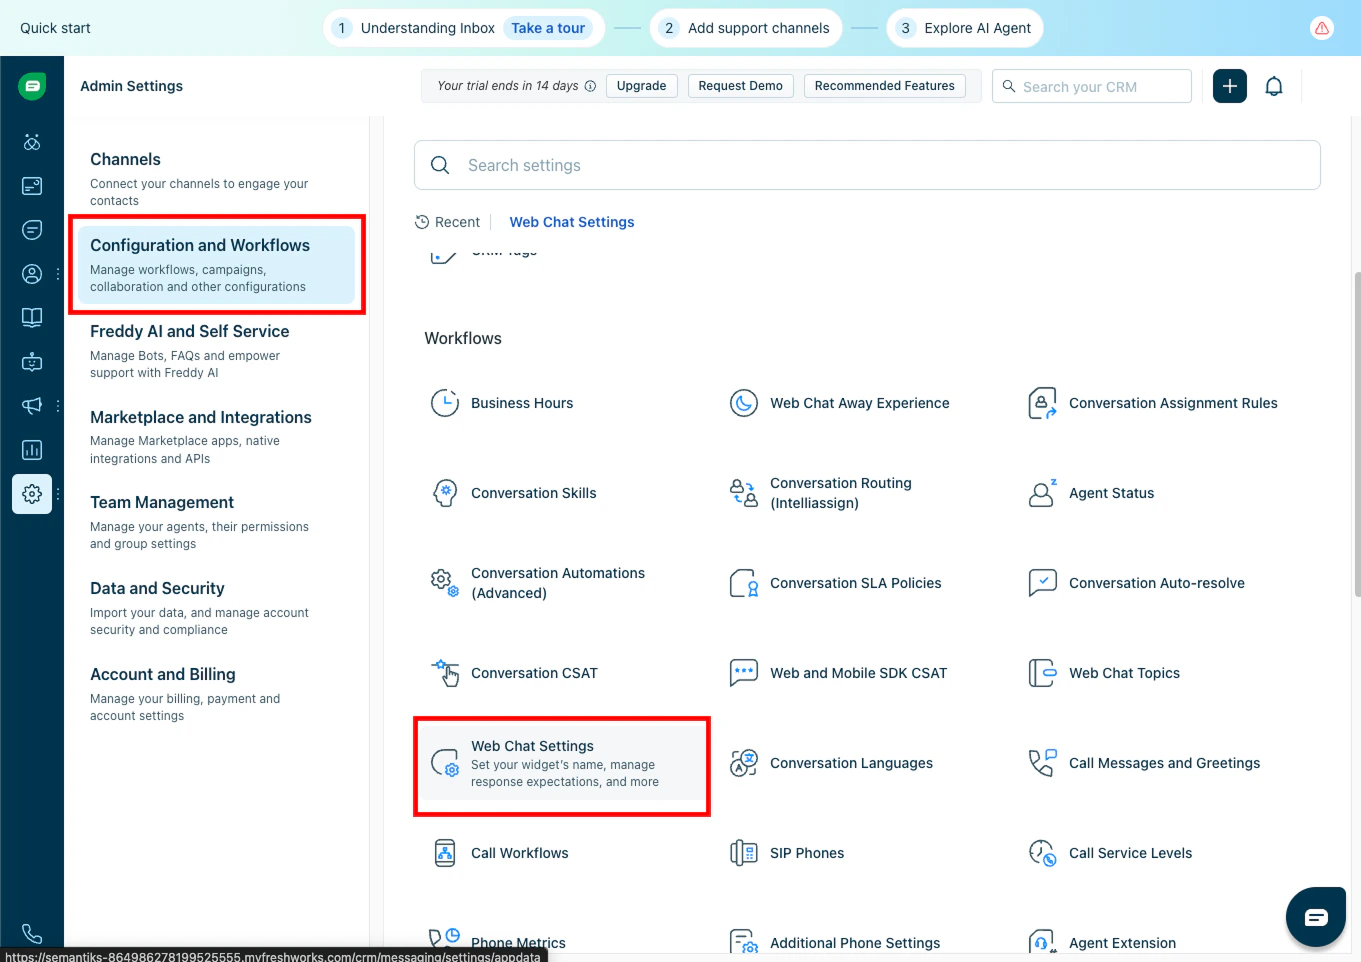
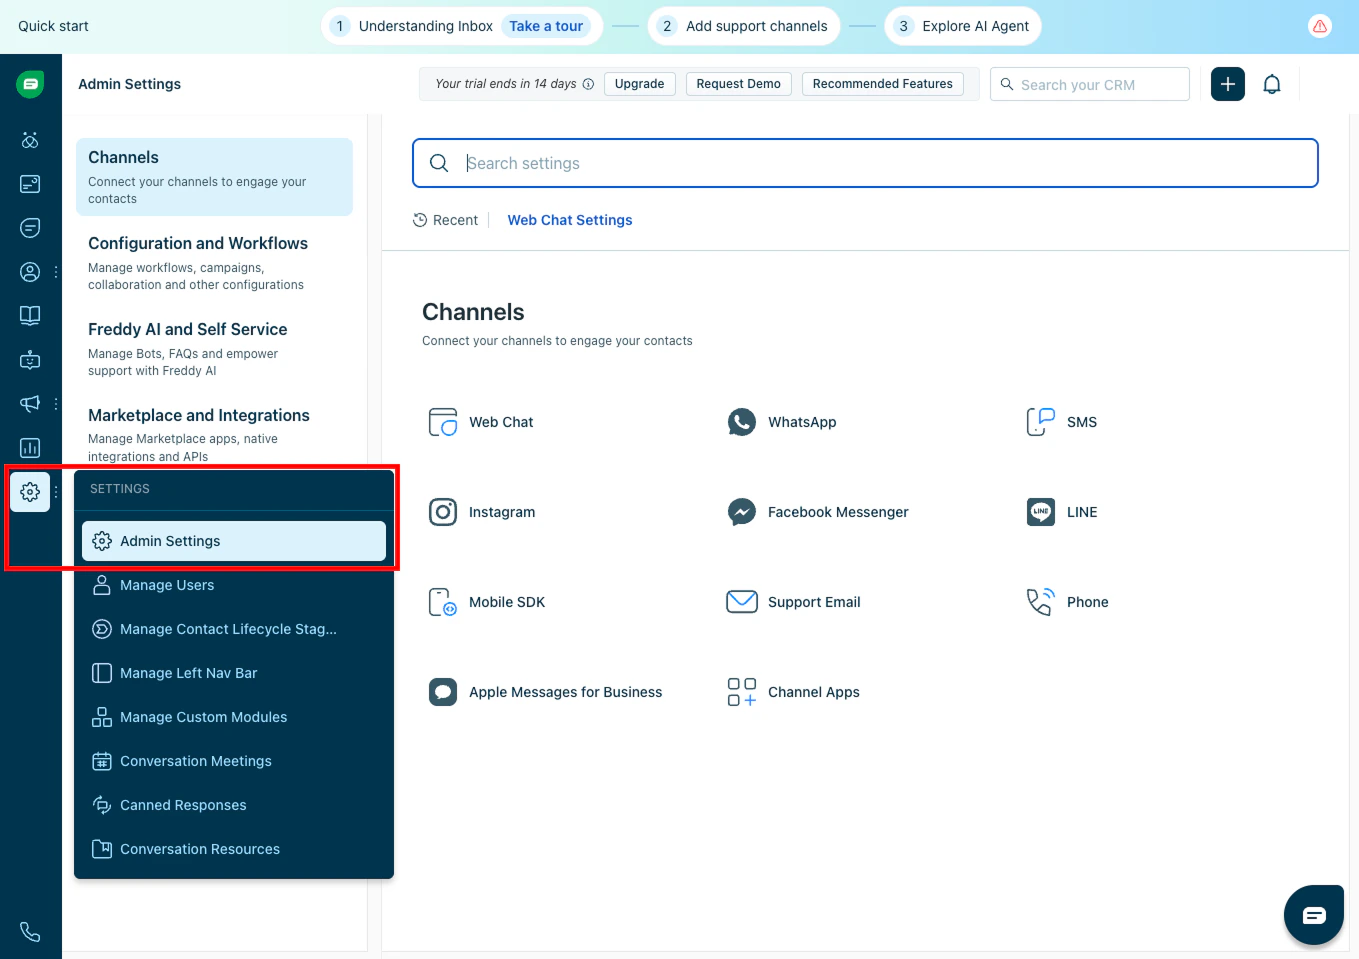 3. Find and enter the Configuration and Workflows section.
4. Select Webchat Settings.
3. Find and enter the Configuration and Workflows section.
4. Select Webchat Settings.
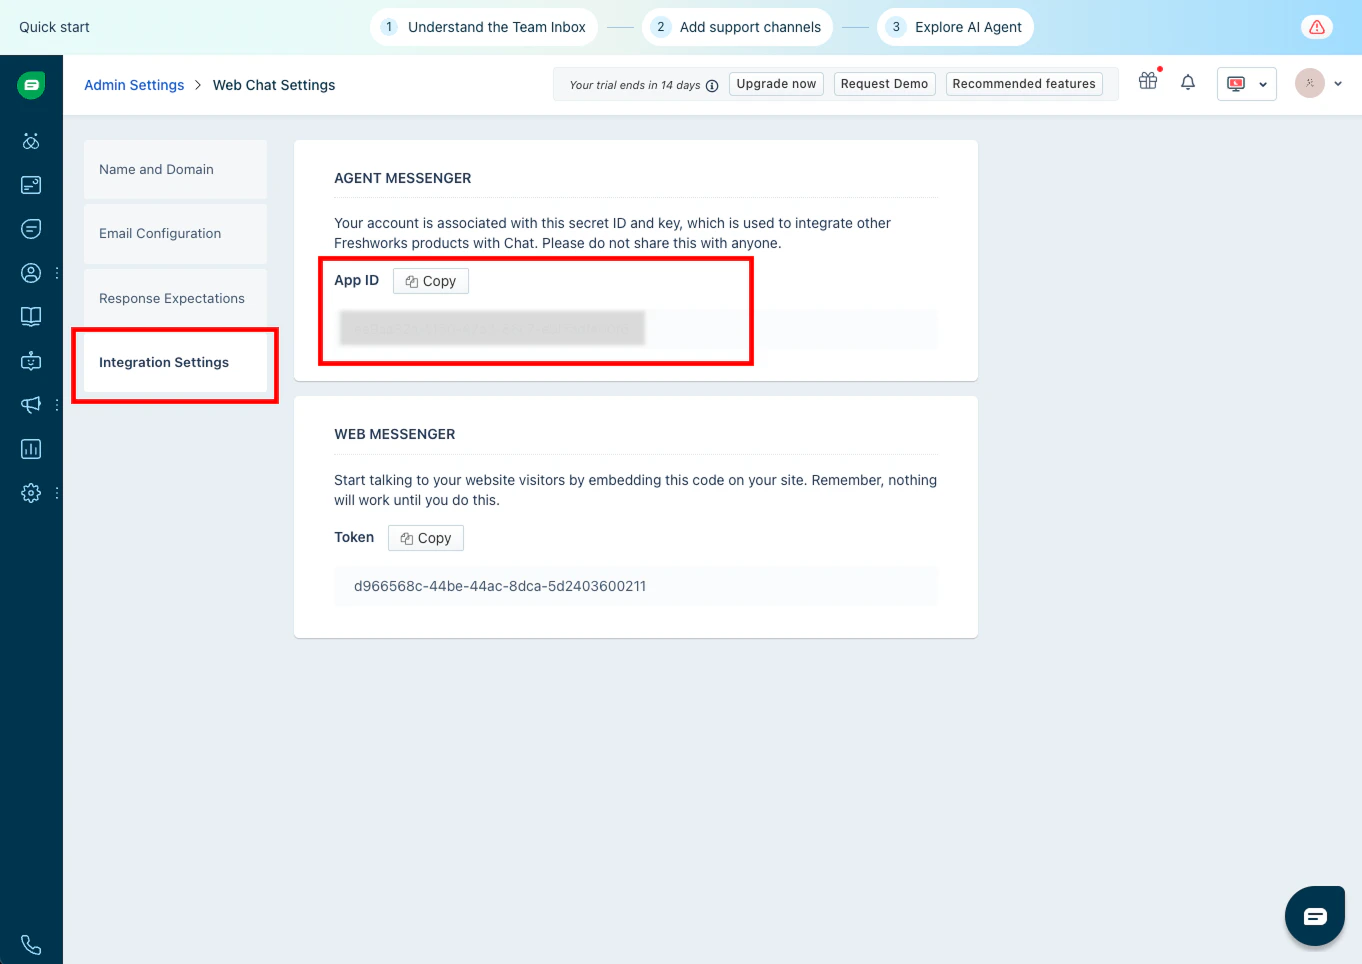
 5. Then, click on Integration Settings.
6. Here you will find your App ID — copy and save it.
5. Then, click on Integration Settings.
6. Here you will find your App ID — copy and save it.
 The API Key and Base URL allow you to authenticate the integration from Semantiks to Freshchat.
**Steps:**
1. Go back to the main Admin Settings panel.
2. Now go to Marketplace and Integrations.
3. In this section, select API Settings.
The API Key and Base URL allow you to authenticate the integration from Semantiks to Freshchat.
**Steps:**
1. Go back to the main Admin Settings panel.
2. Now go to Marketplace and Integrations.
3. In this section, select API Settings.
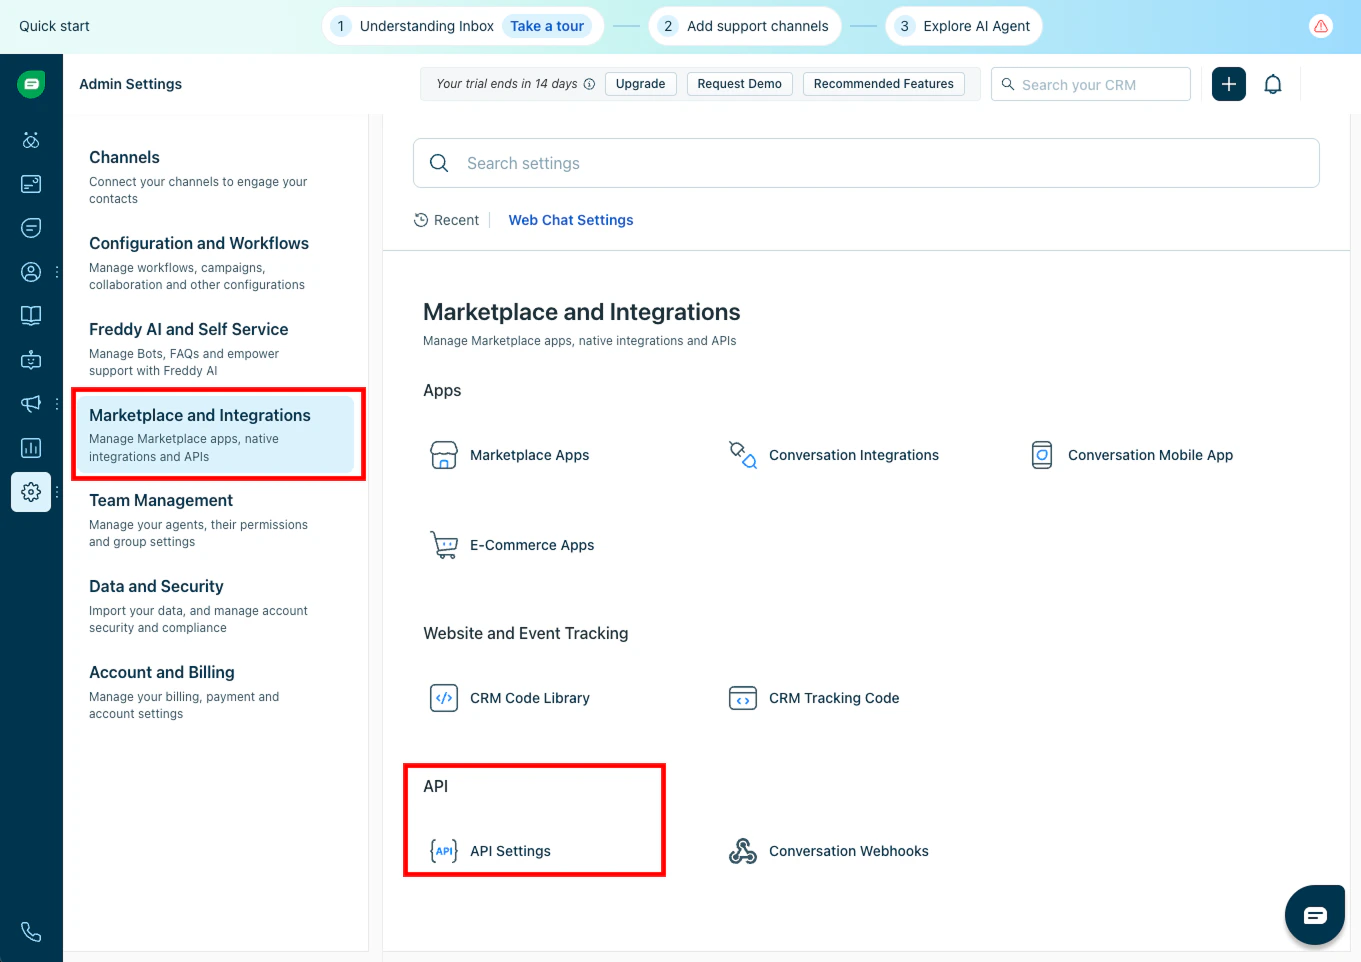 4. Here you can view and copy:
* API Key
* Base URL
4. Here you can view and copy:
* API Key
* Base URL
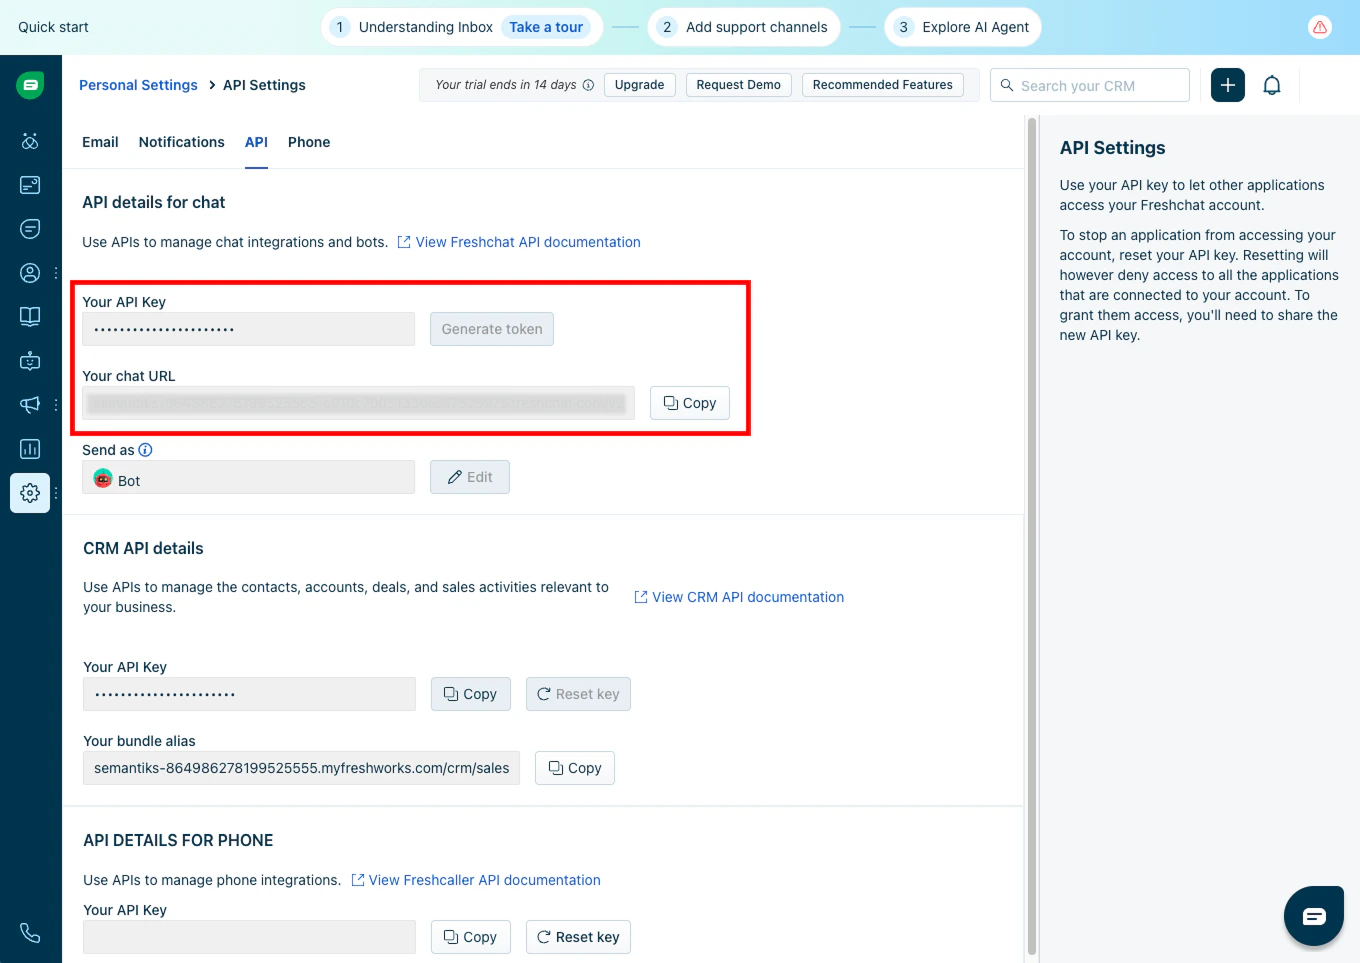 It's very important to keep these values safe. The API Key is sensitive and should not be shared publicly.
The Webhook and Public Key are essential to ensure secure communication between Freshchat and Semantiks.
**Steps:**
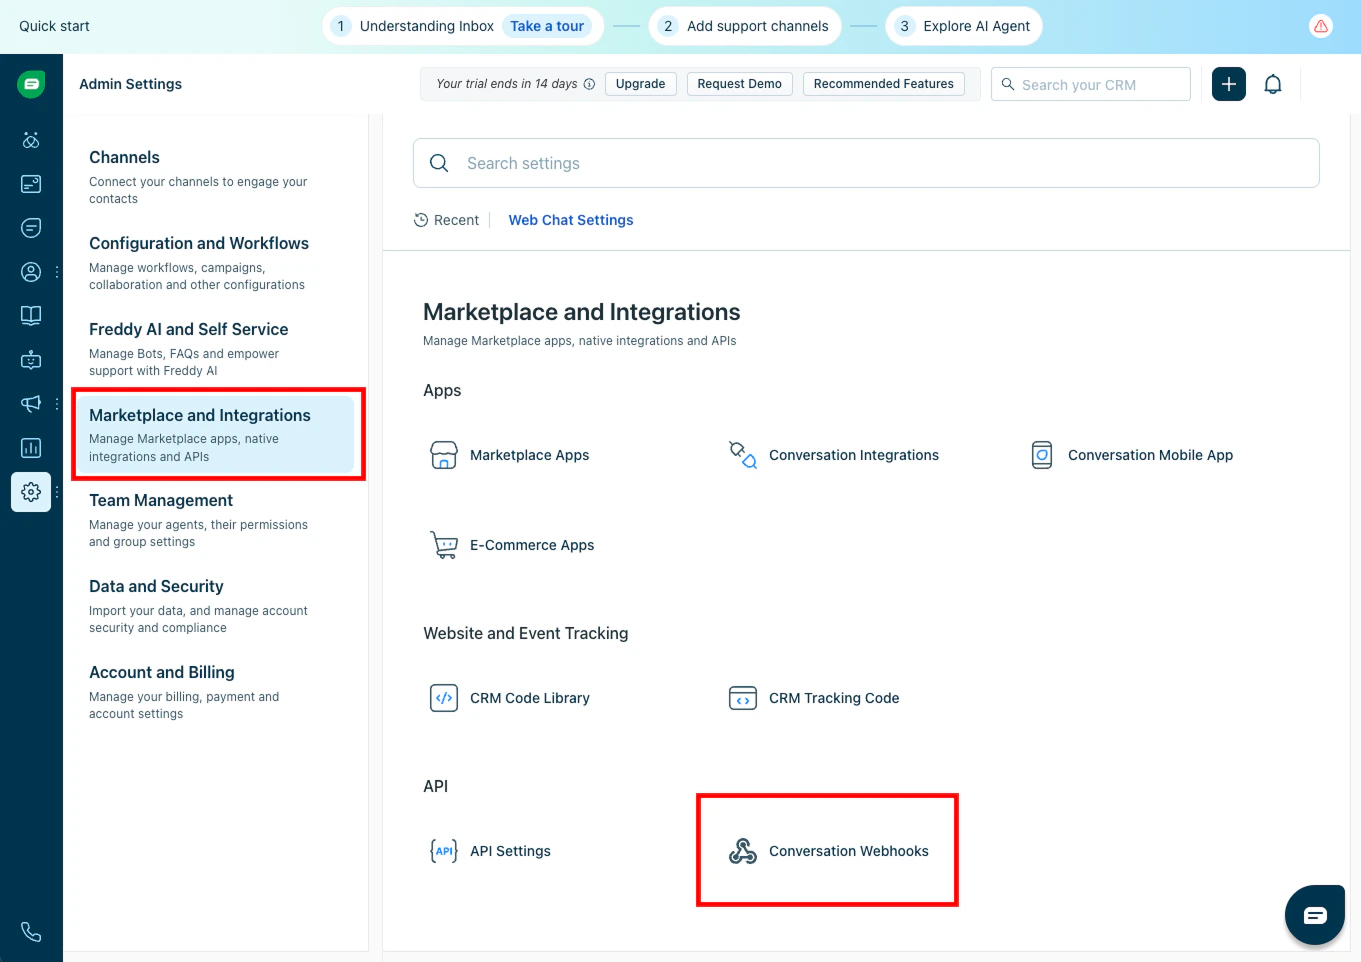
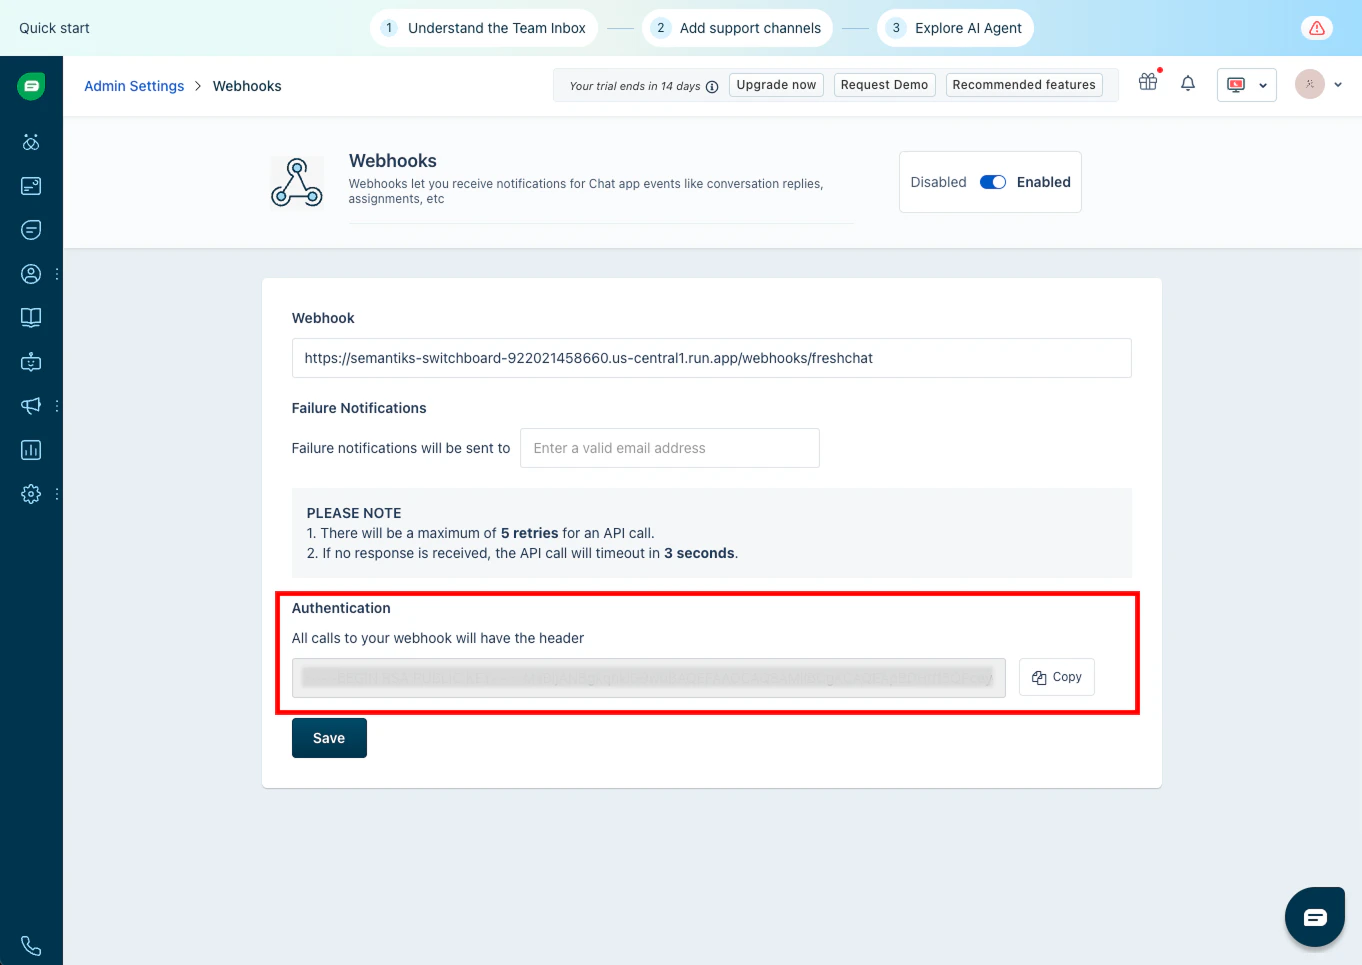
1. Stay in the same API Settings section within Marketplace and Integrations, and select Conversation Webhooks:
It's very important to keep these values safe. The API Key is sensitive and should not be shared publicly.
The Webhook and Public Key are essential to ensure secure communication between Freshchat and Semantiks.
**Steps:**
1. Stay in the same API Settings section within Marketplace and Integrations, and select Conversation Webhooks:
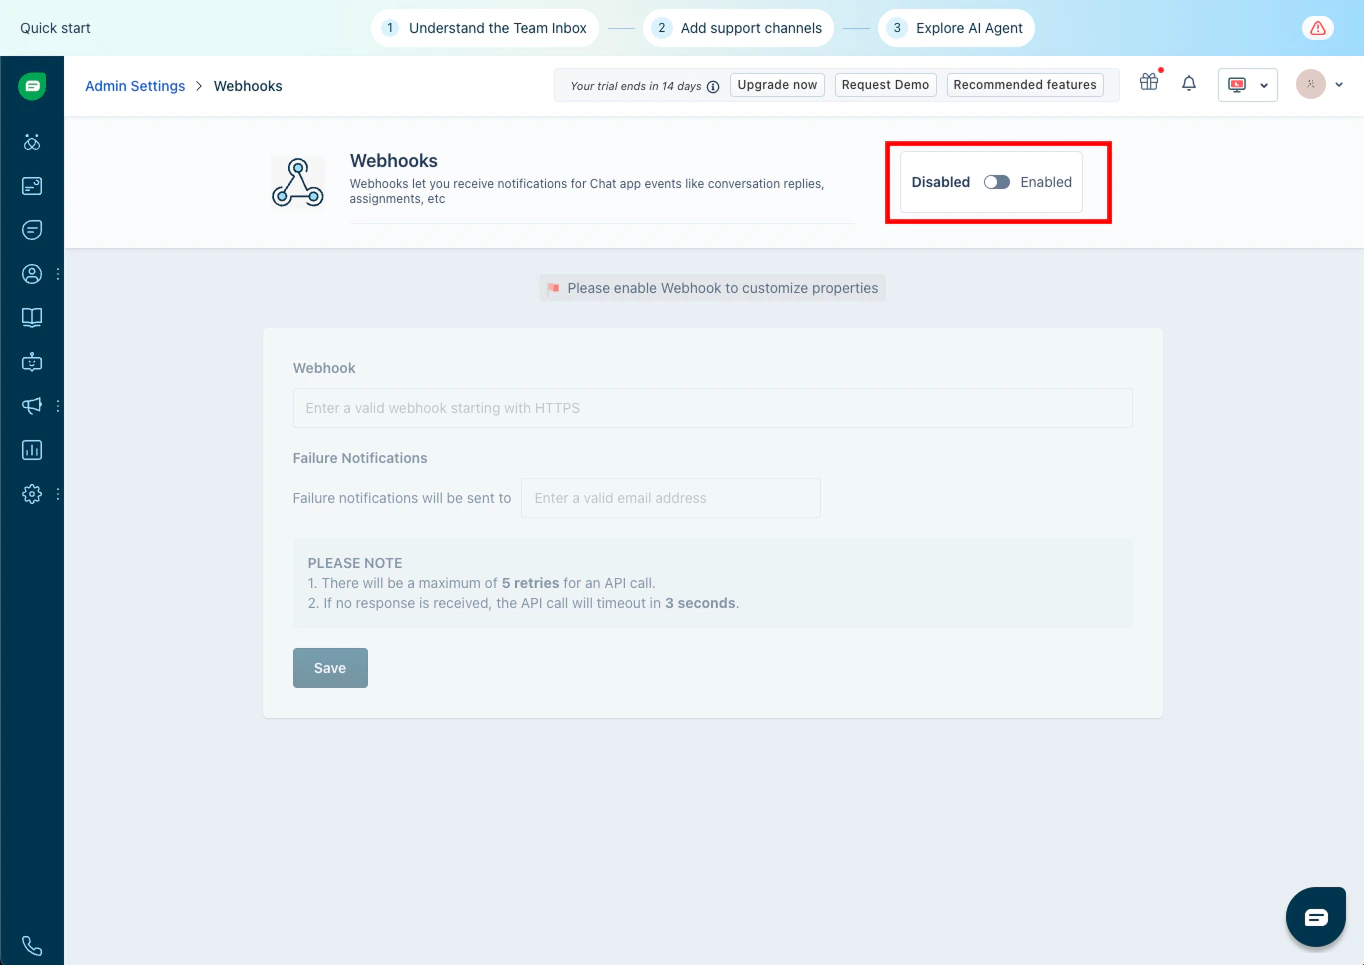
 2. Click the Enable button if you haven't activated it yet.
 3. Once enabled, in the first *Webhook* text box, paste this URL:
```bash Webhook URL theme={null}
https://semantiks-switchboard-922021458660.us-central1.run.app/webhooks/freshchat
```
3. Once enabled, in the first *Webhook* text box, paste this URL:
```bash Webhook URL theme={null}
https://semantiks-switchboard-922021458660.us-central1.run.app/webhooks/freshchat
```
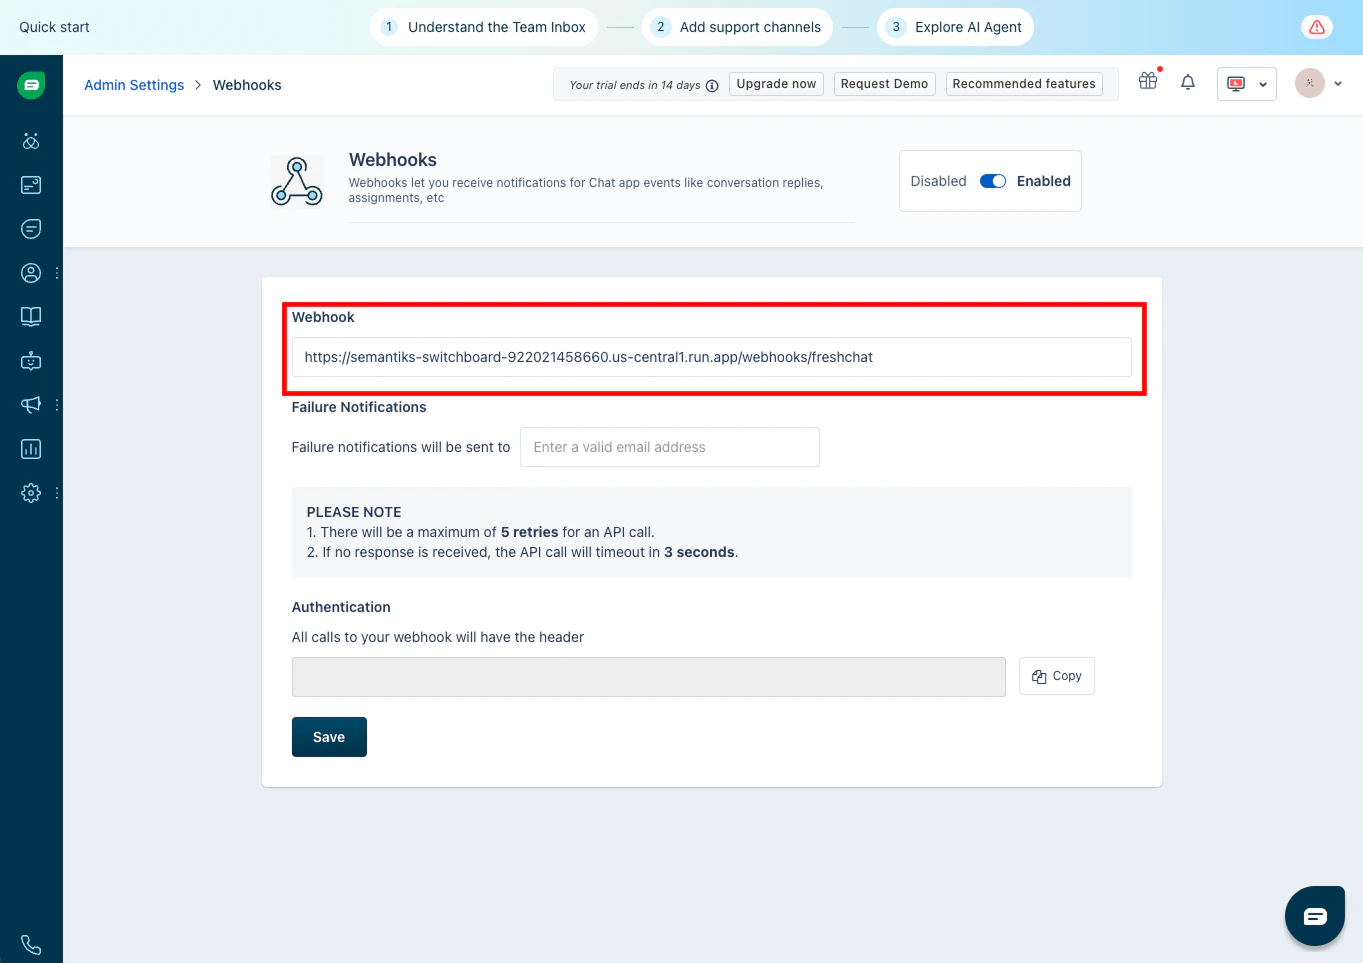 4. When you activate the webhook, Freshchat will show you a Public Key in the *Authentication* section. Copy this key — it will be needed to verify that messages really come from Freshchat.
 With these four pieces of information:
* App ID
* Public Key
* Base URL
* API Key
1. Log in to your Semantiks console with your account.
2. In the left menu, click on Channels and select the external channels tab.\\
With these four pieces of information:
* App ID
* Public Key
* Base URL
* API Key
1. Log in to your Semantiks console with your account.
2. In the left menu, click on Channels and select the external channels tab.\\
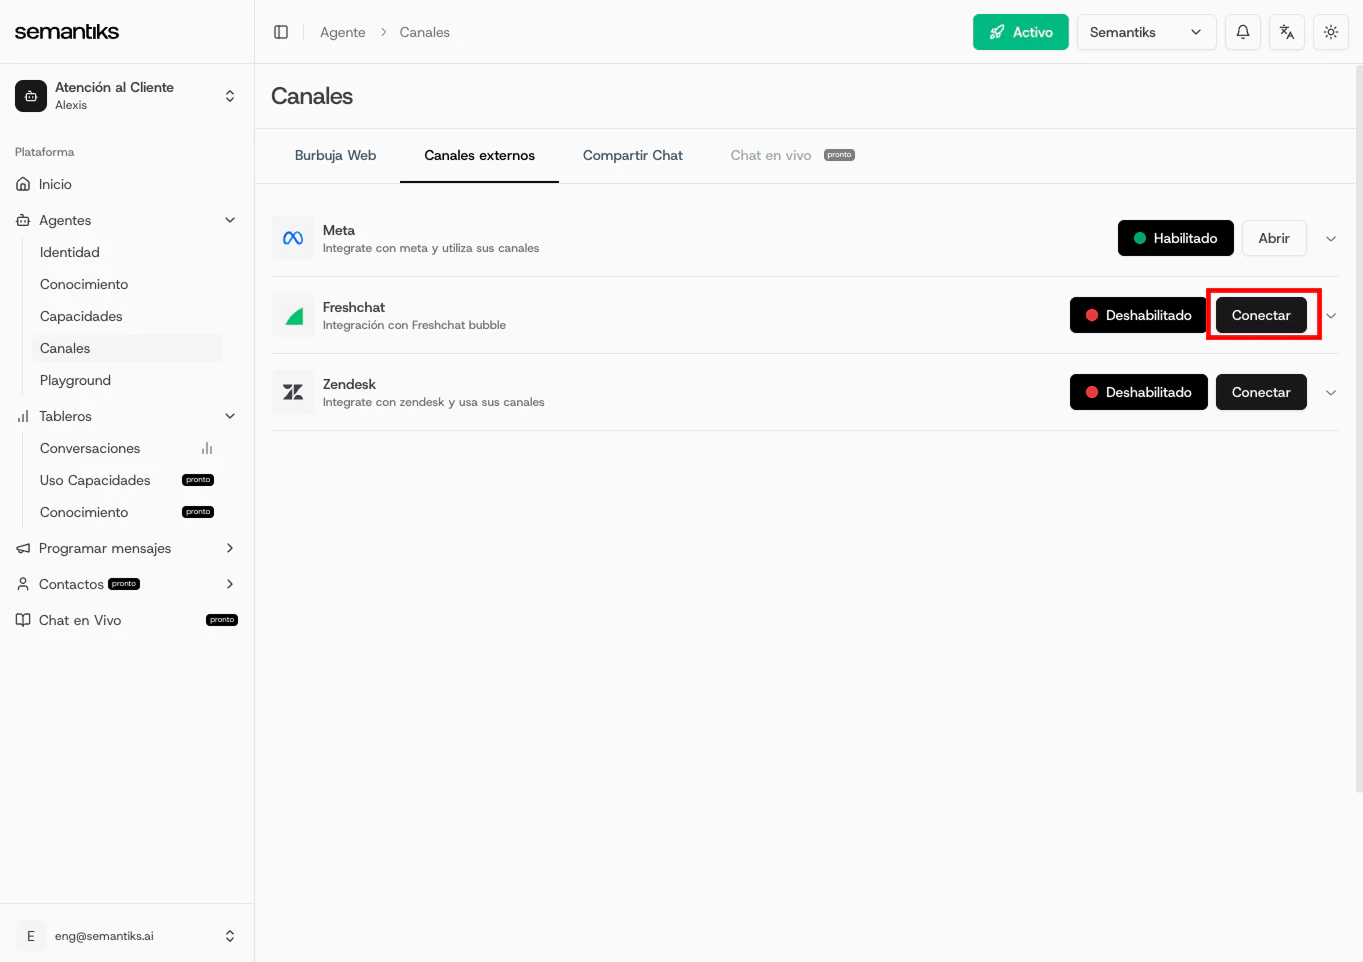
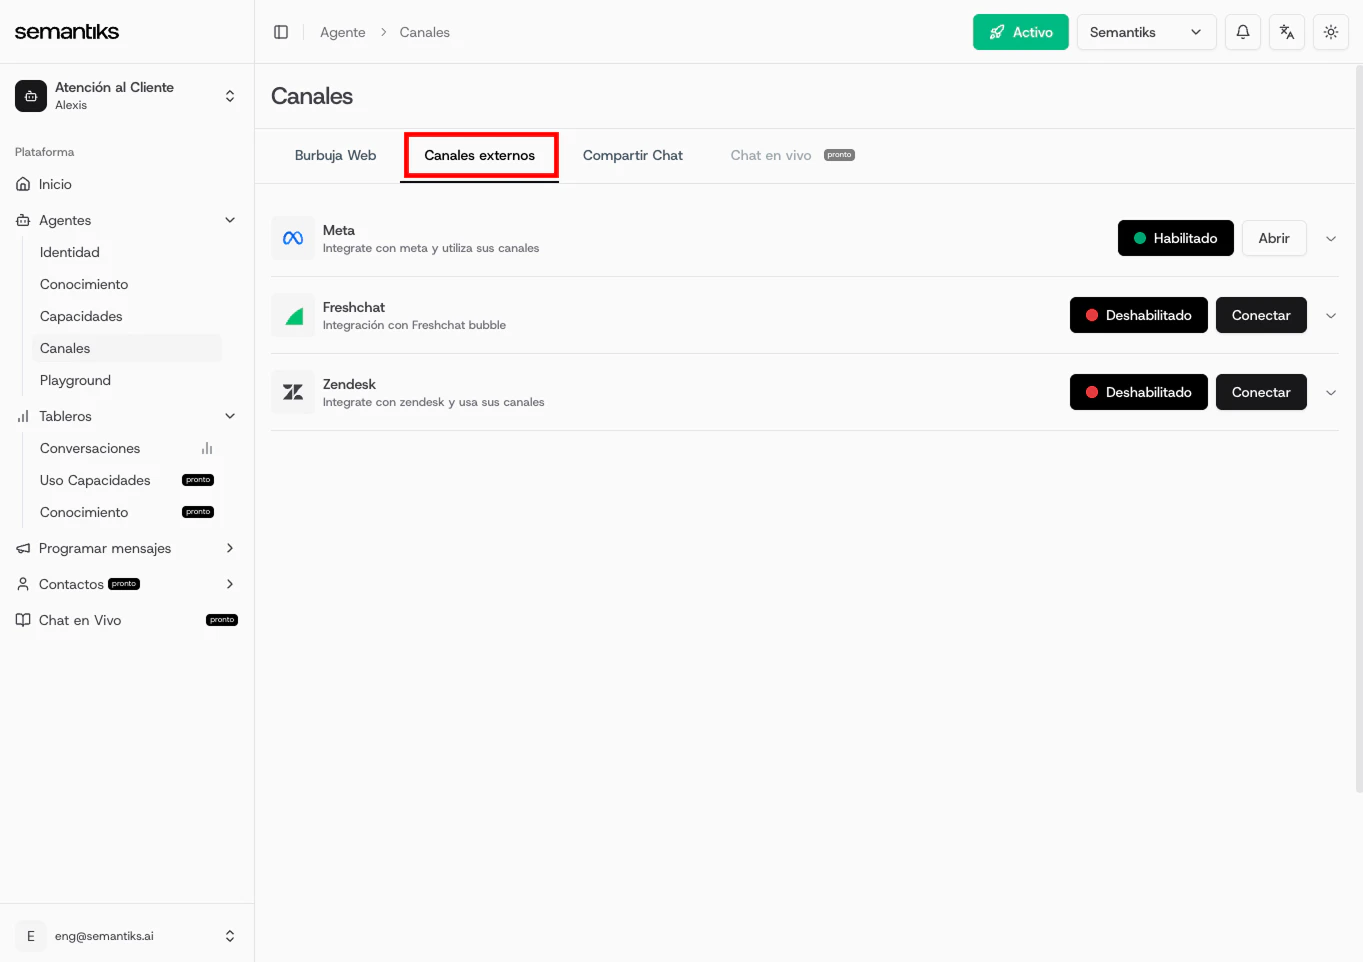 3. Find the Freshchat box and click the Connect button.
 4. When you click, a form will open where you must enter the following fields:
* App ID
* Public Key
* Base URL
* API Key
4. When you click, a form will open where you must enter the following fields:
* App ID
* Public Key
* Base URL
* API Key
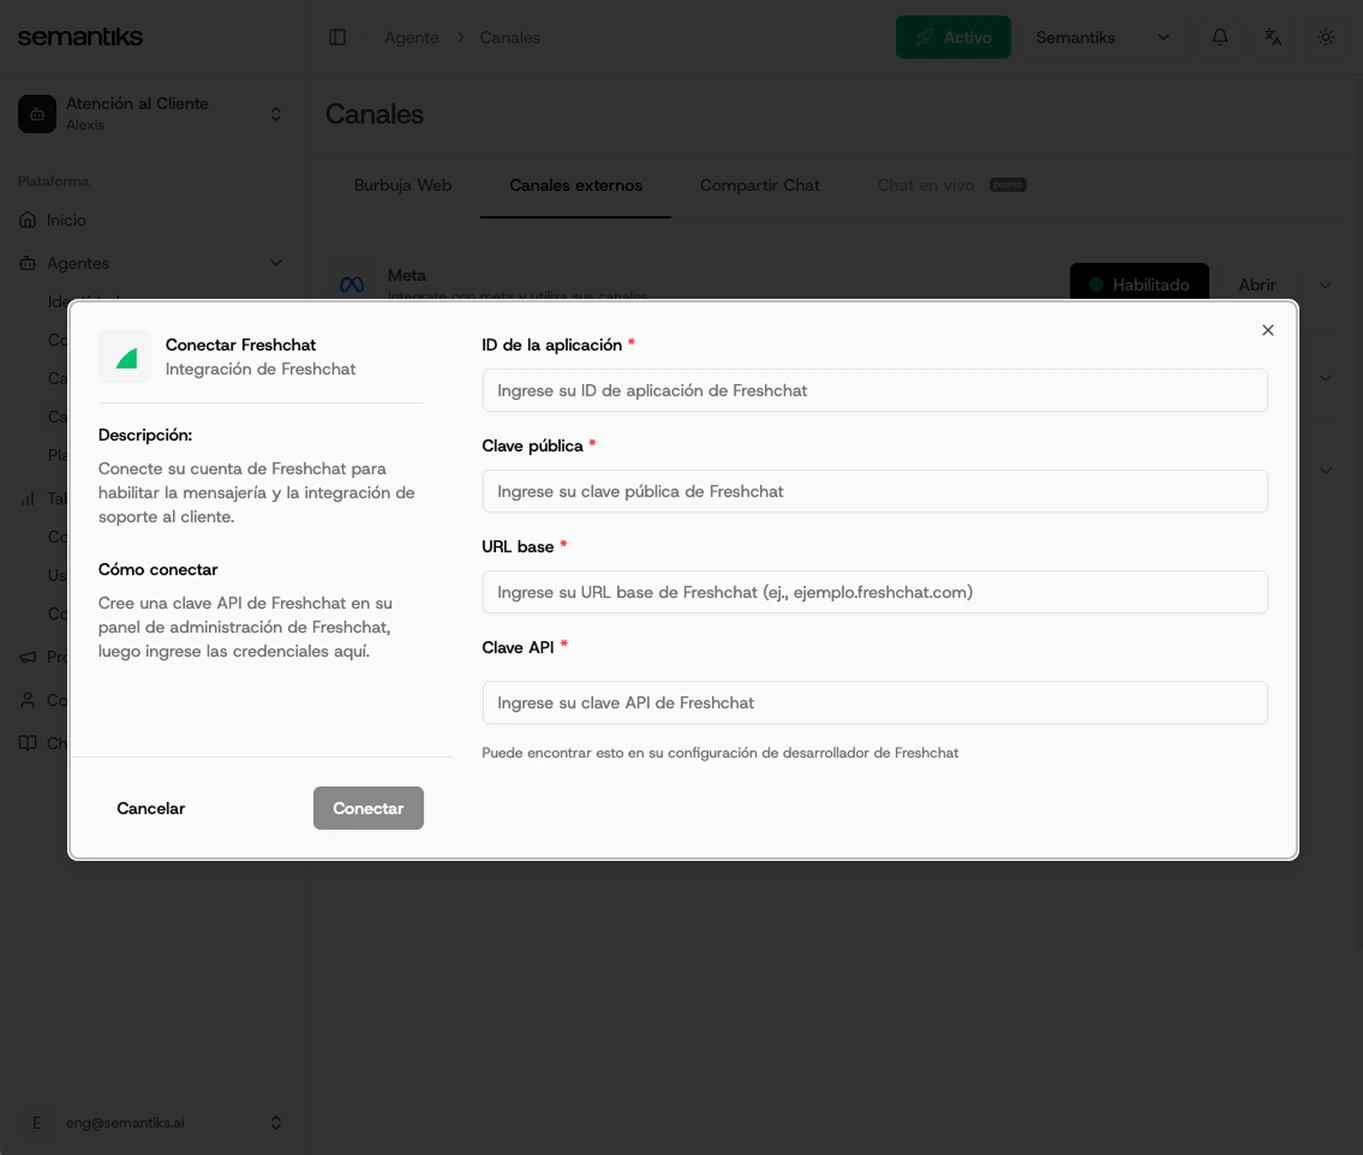 5. Once all fields are filled, click Connect and the integration will be active.
Done! Your Semantiks agent is now connected to Freshchat and ready to start chatting with your users.
5. Once all fields are filled, click Connect and the integration will be active.
Done! Your Semantiks agent is now connected to Freshchat and ready to start chatting with your users.