Adding Knowledge
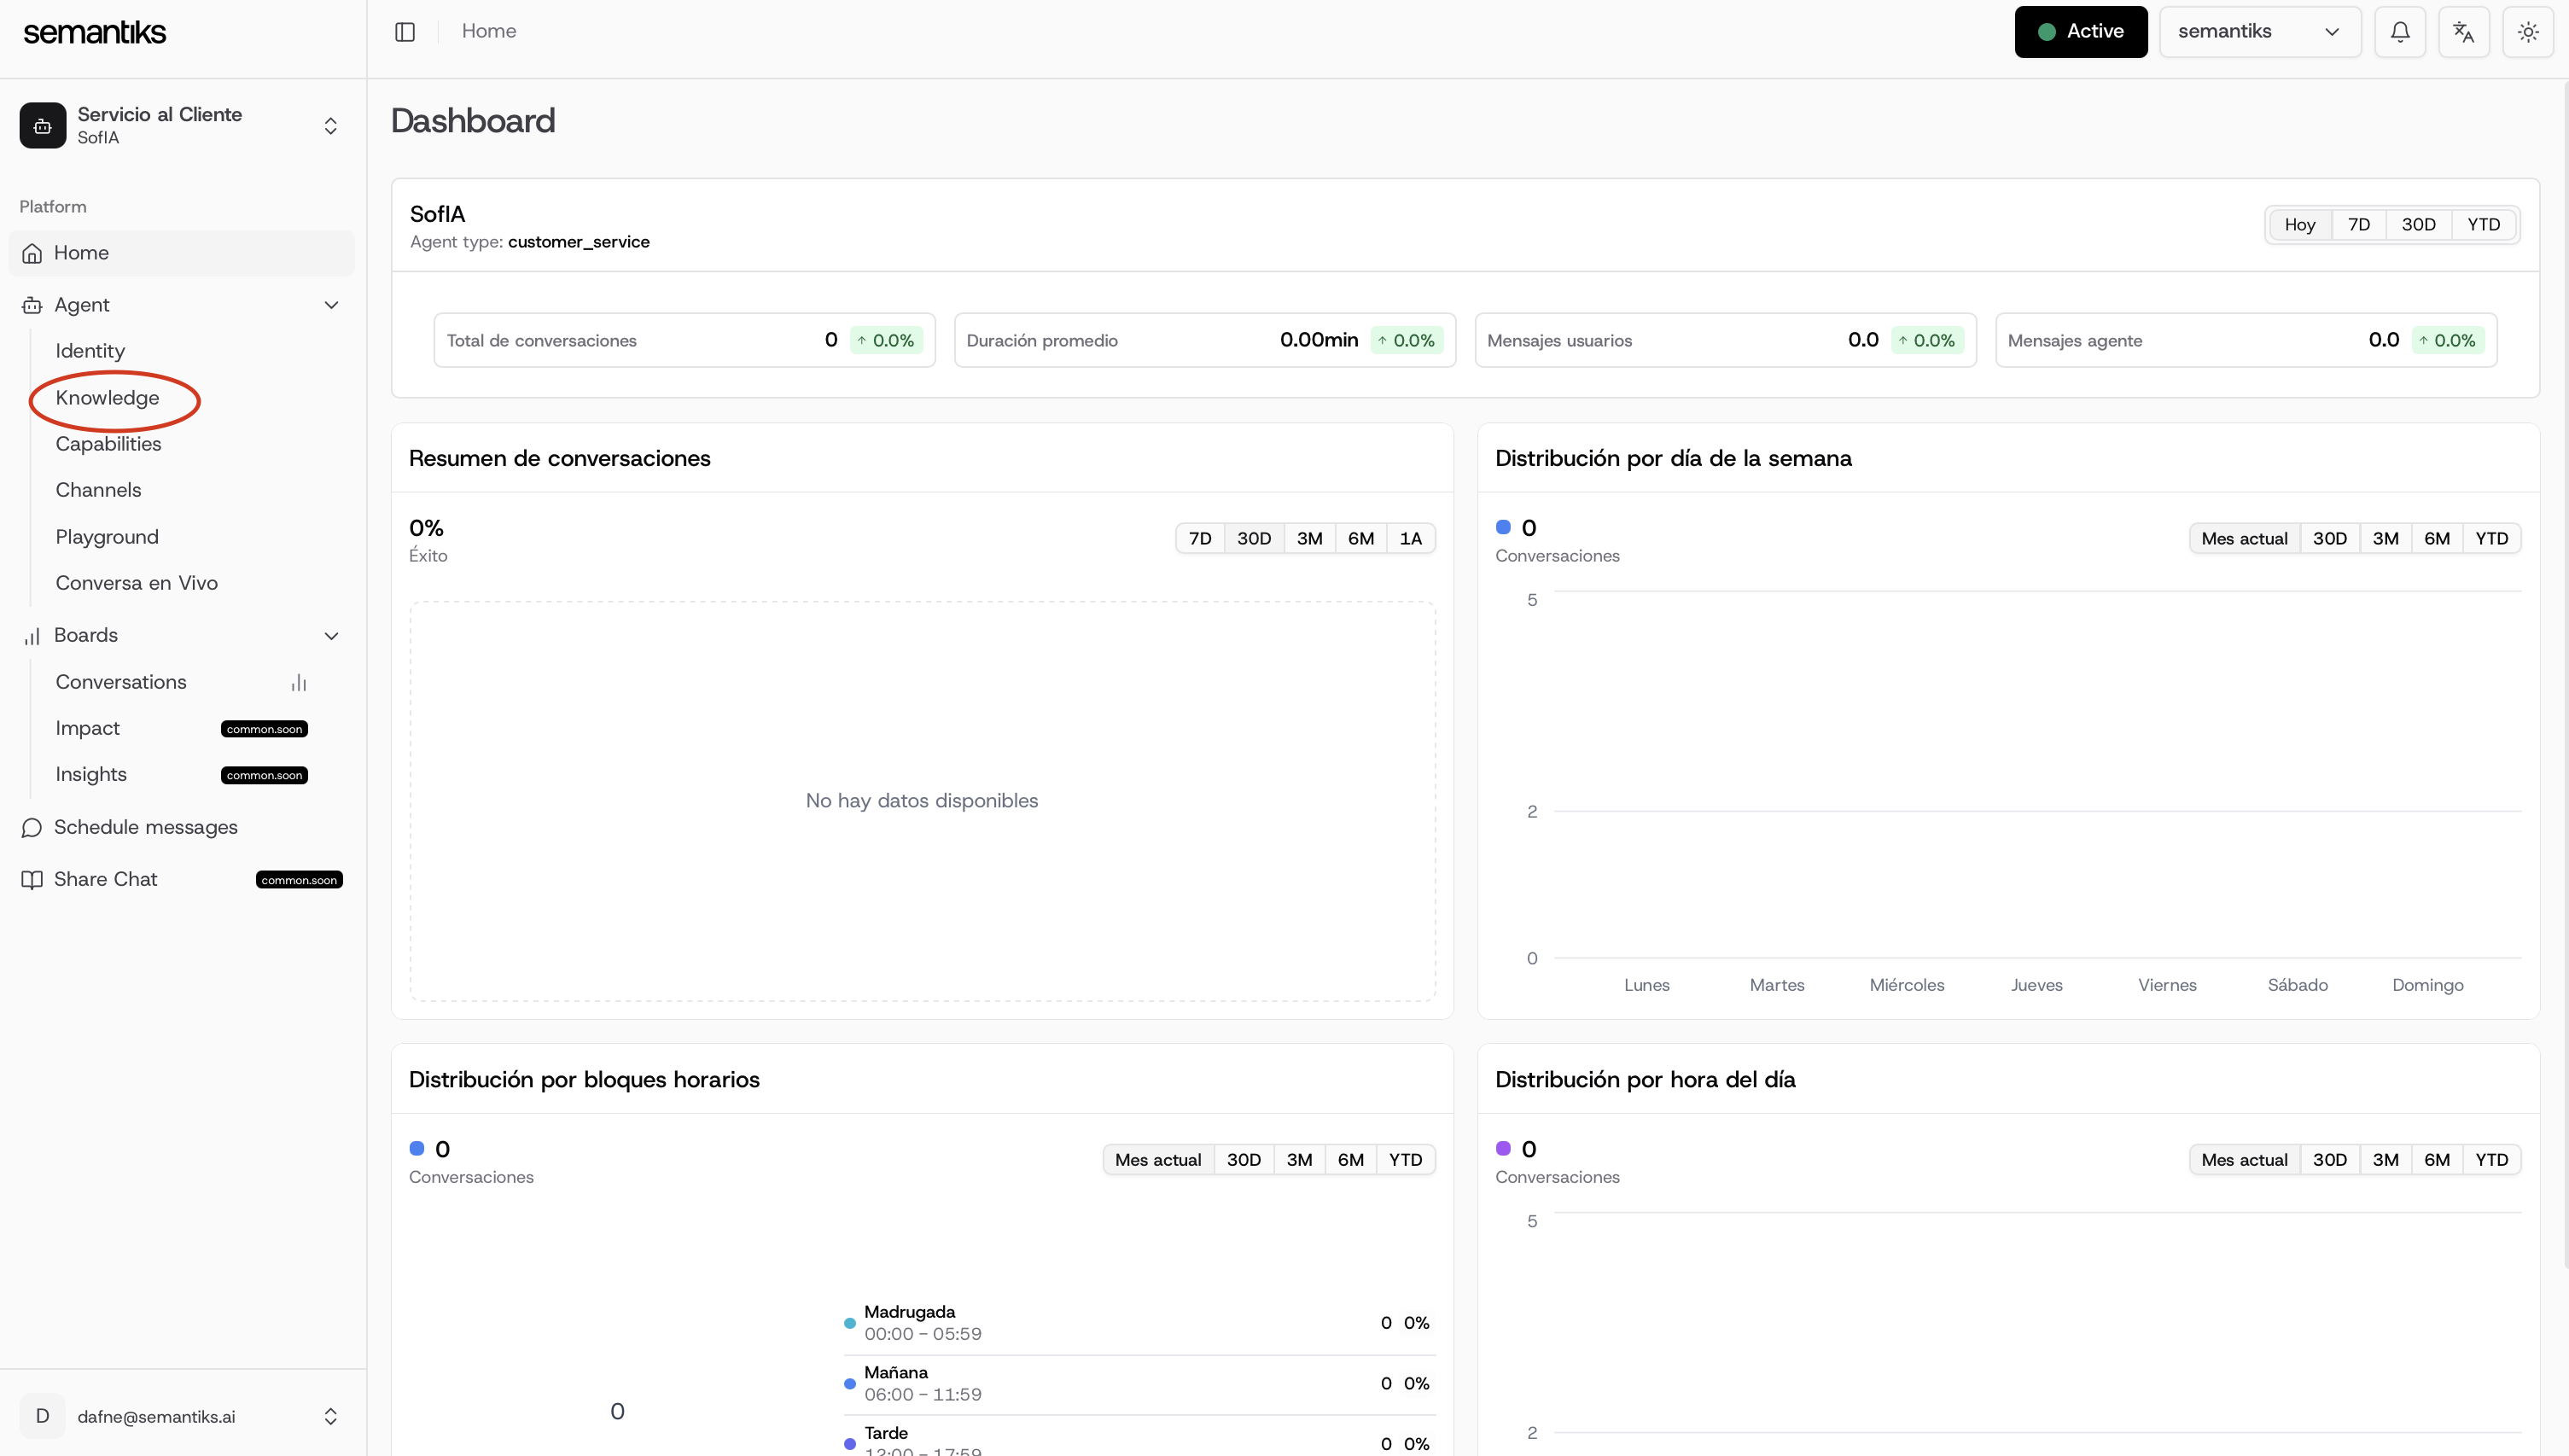
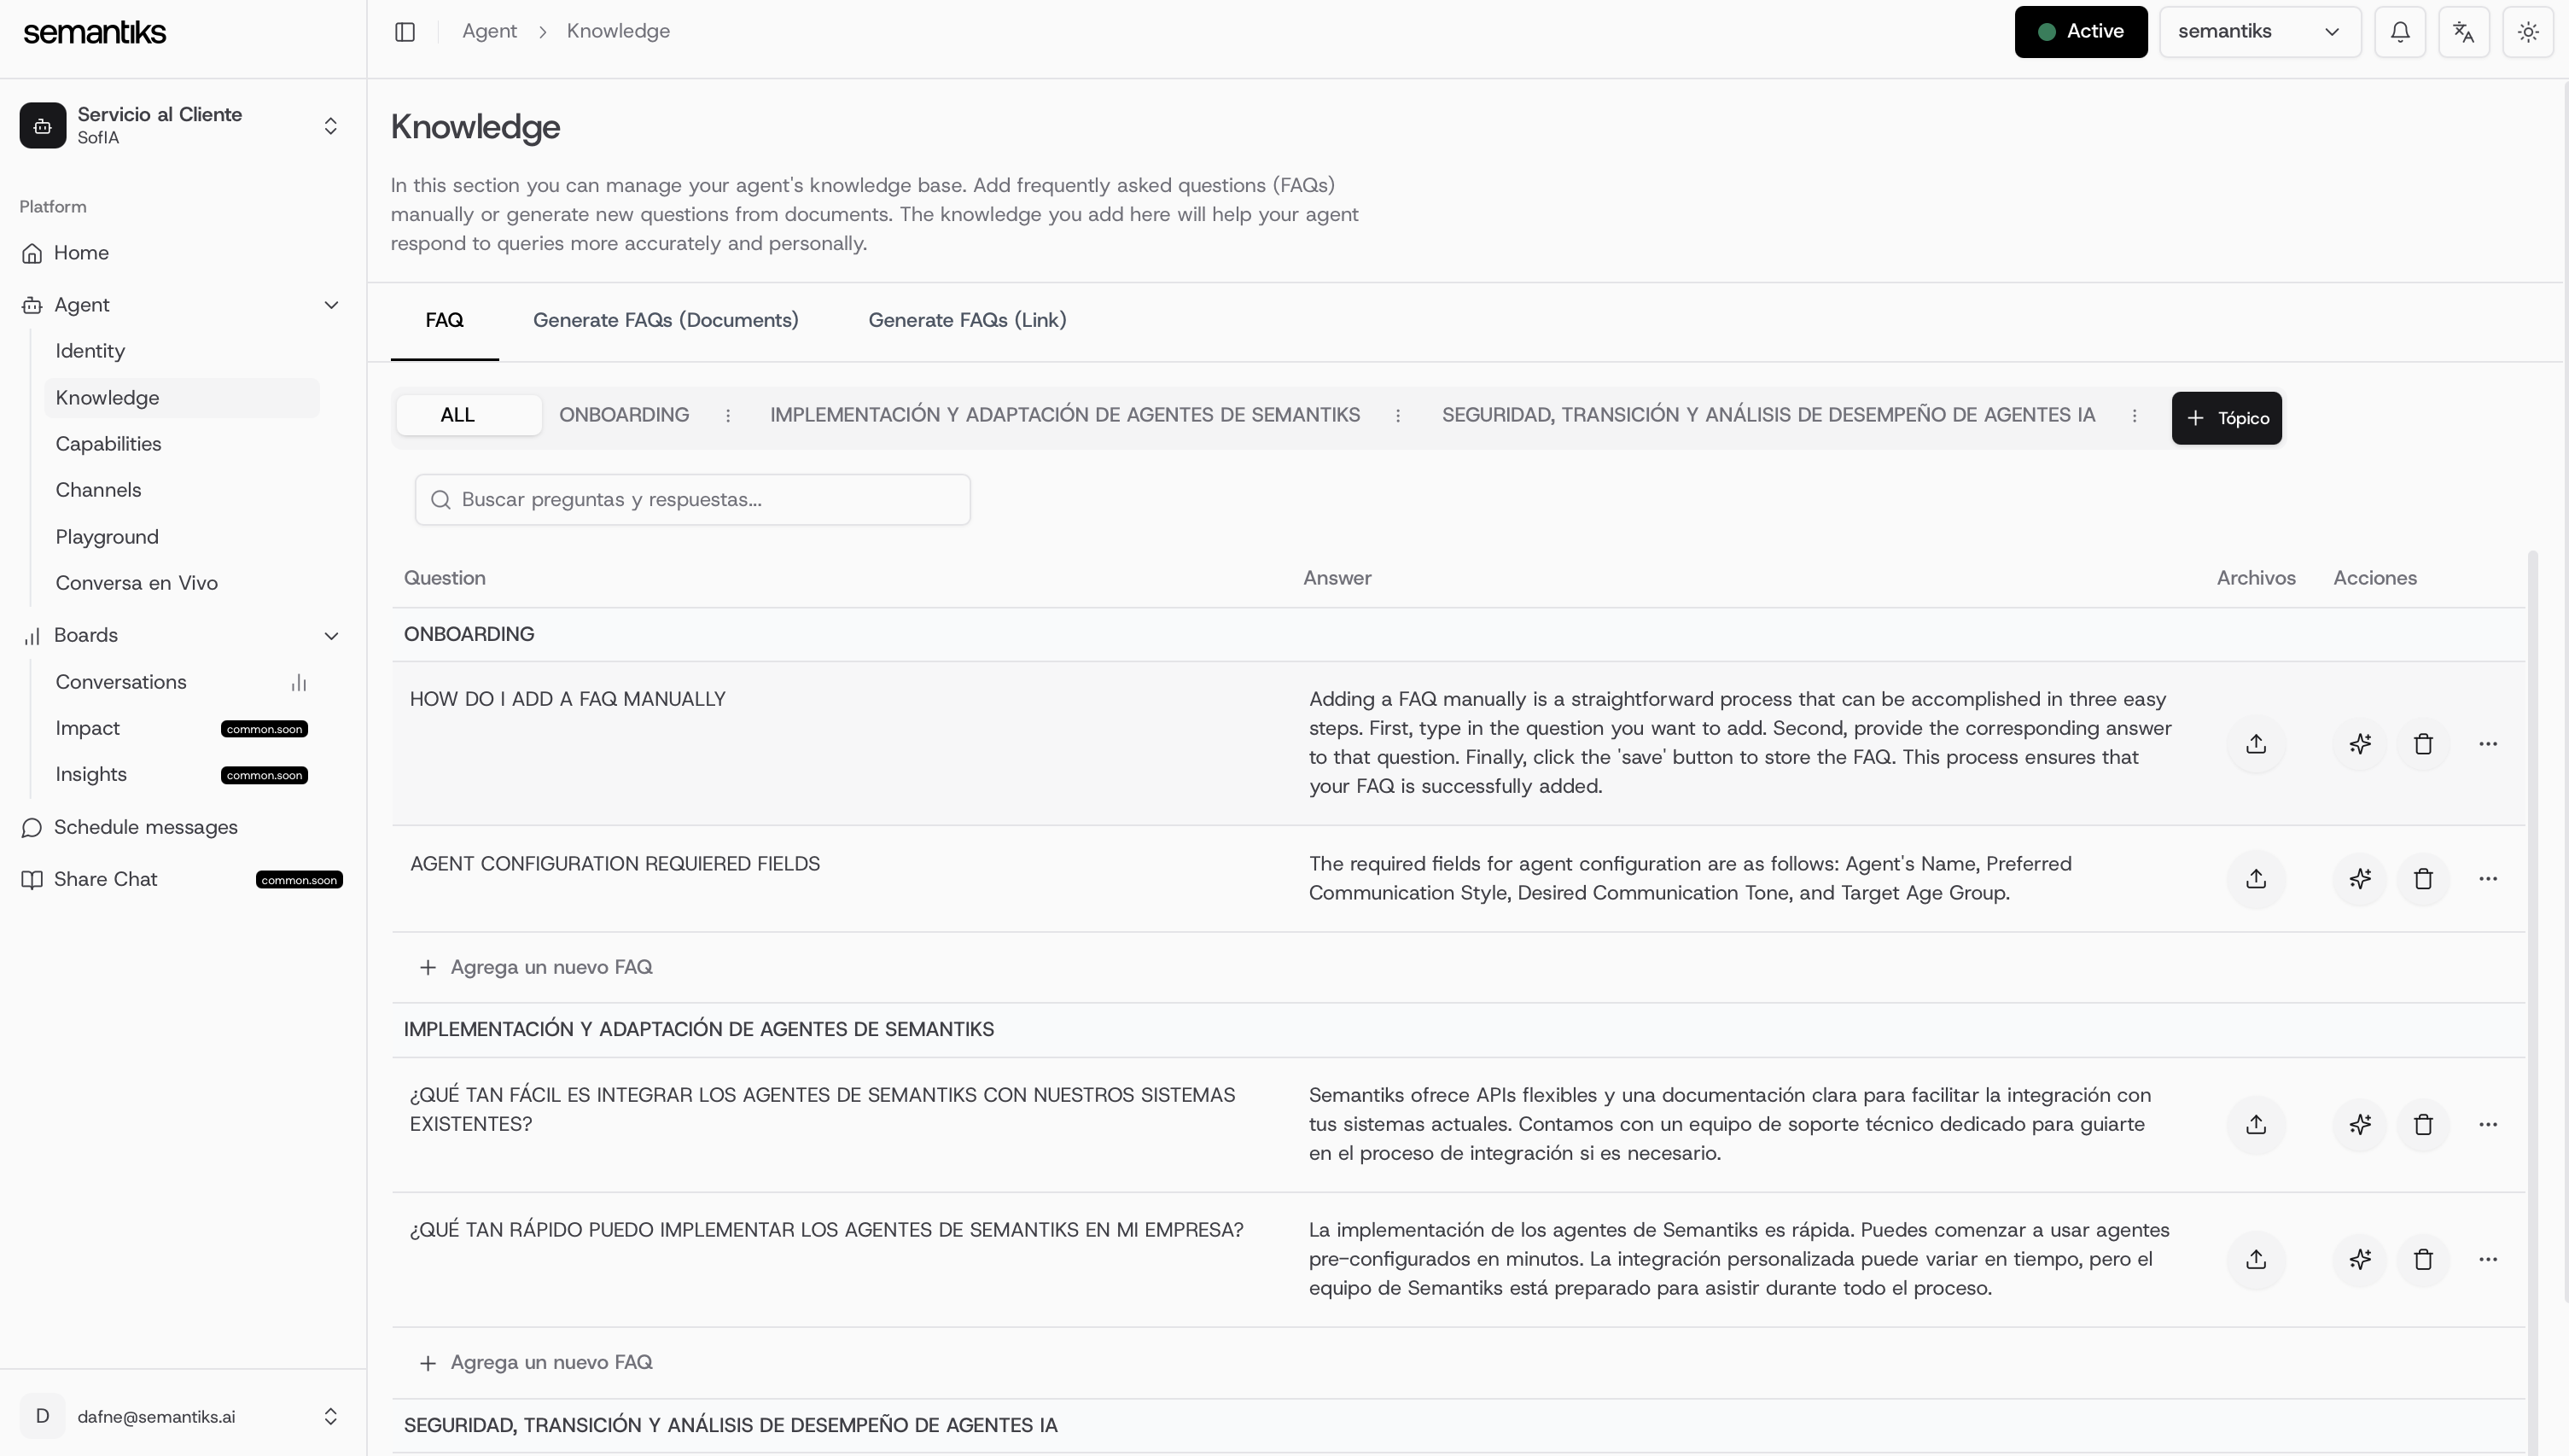
If you are here you already finished the onboarding and have your console ready to set-up. The first step would be adding some knowledge to the agent Knowledge is a key component of your agent.The agent will only respond based on the information available in your knowledge base. This means that adding irrelevant data or lacking essential information can lead to a poor user experience. That’s why setting up your knowledge base correctly is one of the most critical steps when configuring your agent.
TOPICS
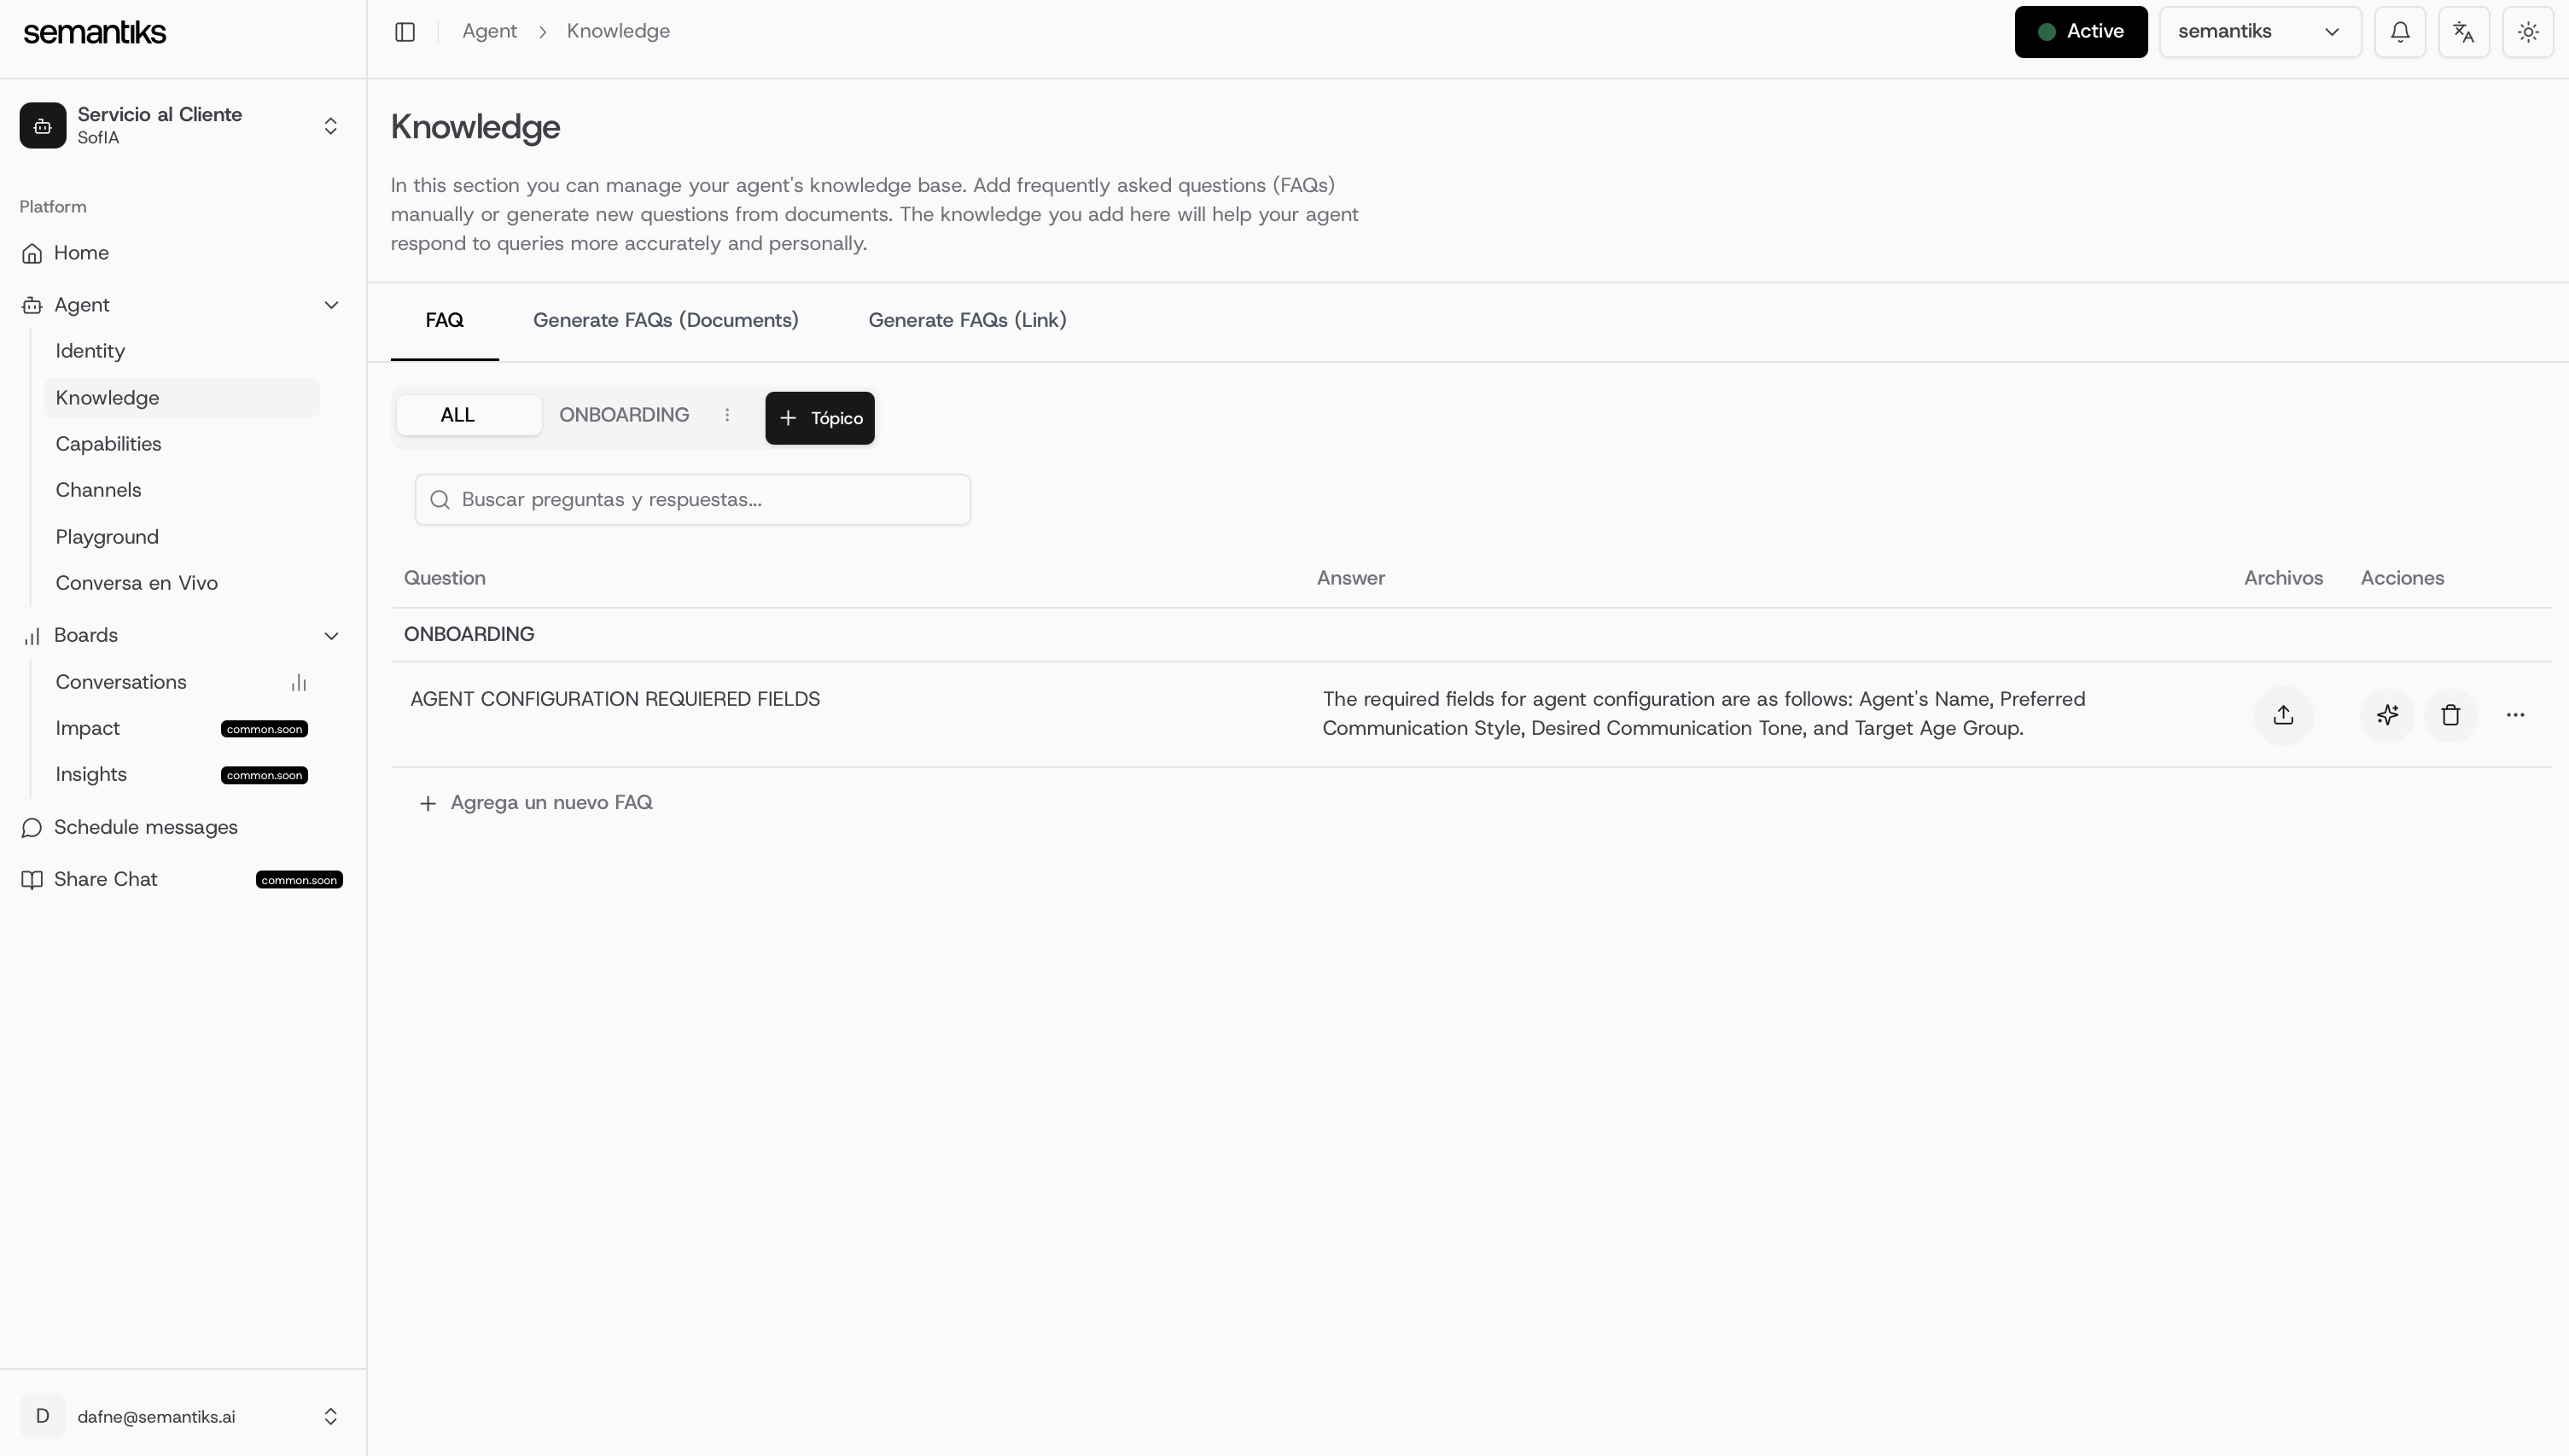
You can organize your FAQs into different topics.This helps the agent find answers more efficiently and accurately, while also making it easier for humans to locate, manage, and add new frequently asked questions.
Adding FAQs
You have three different options to build your knowledge base:- Manually insert FAQs
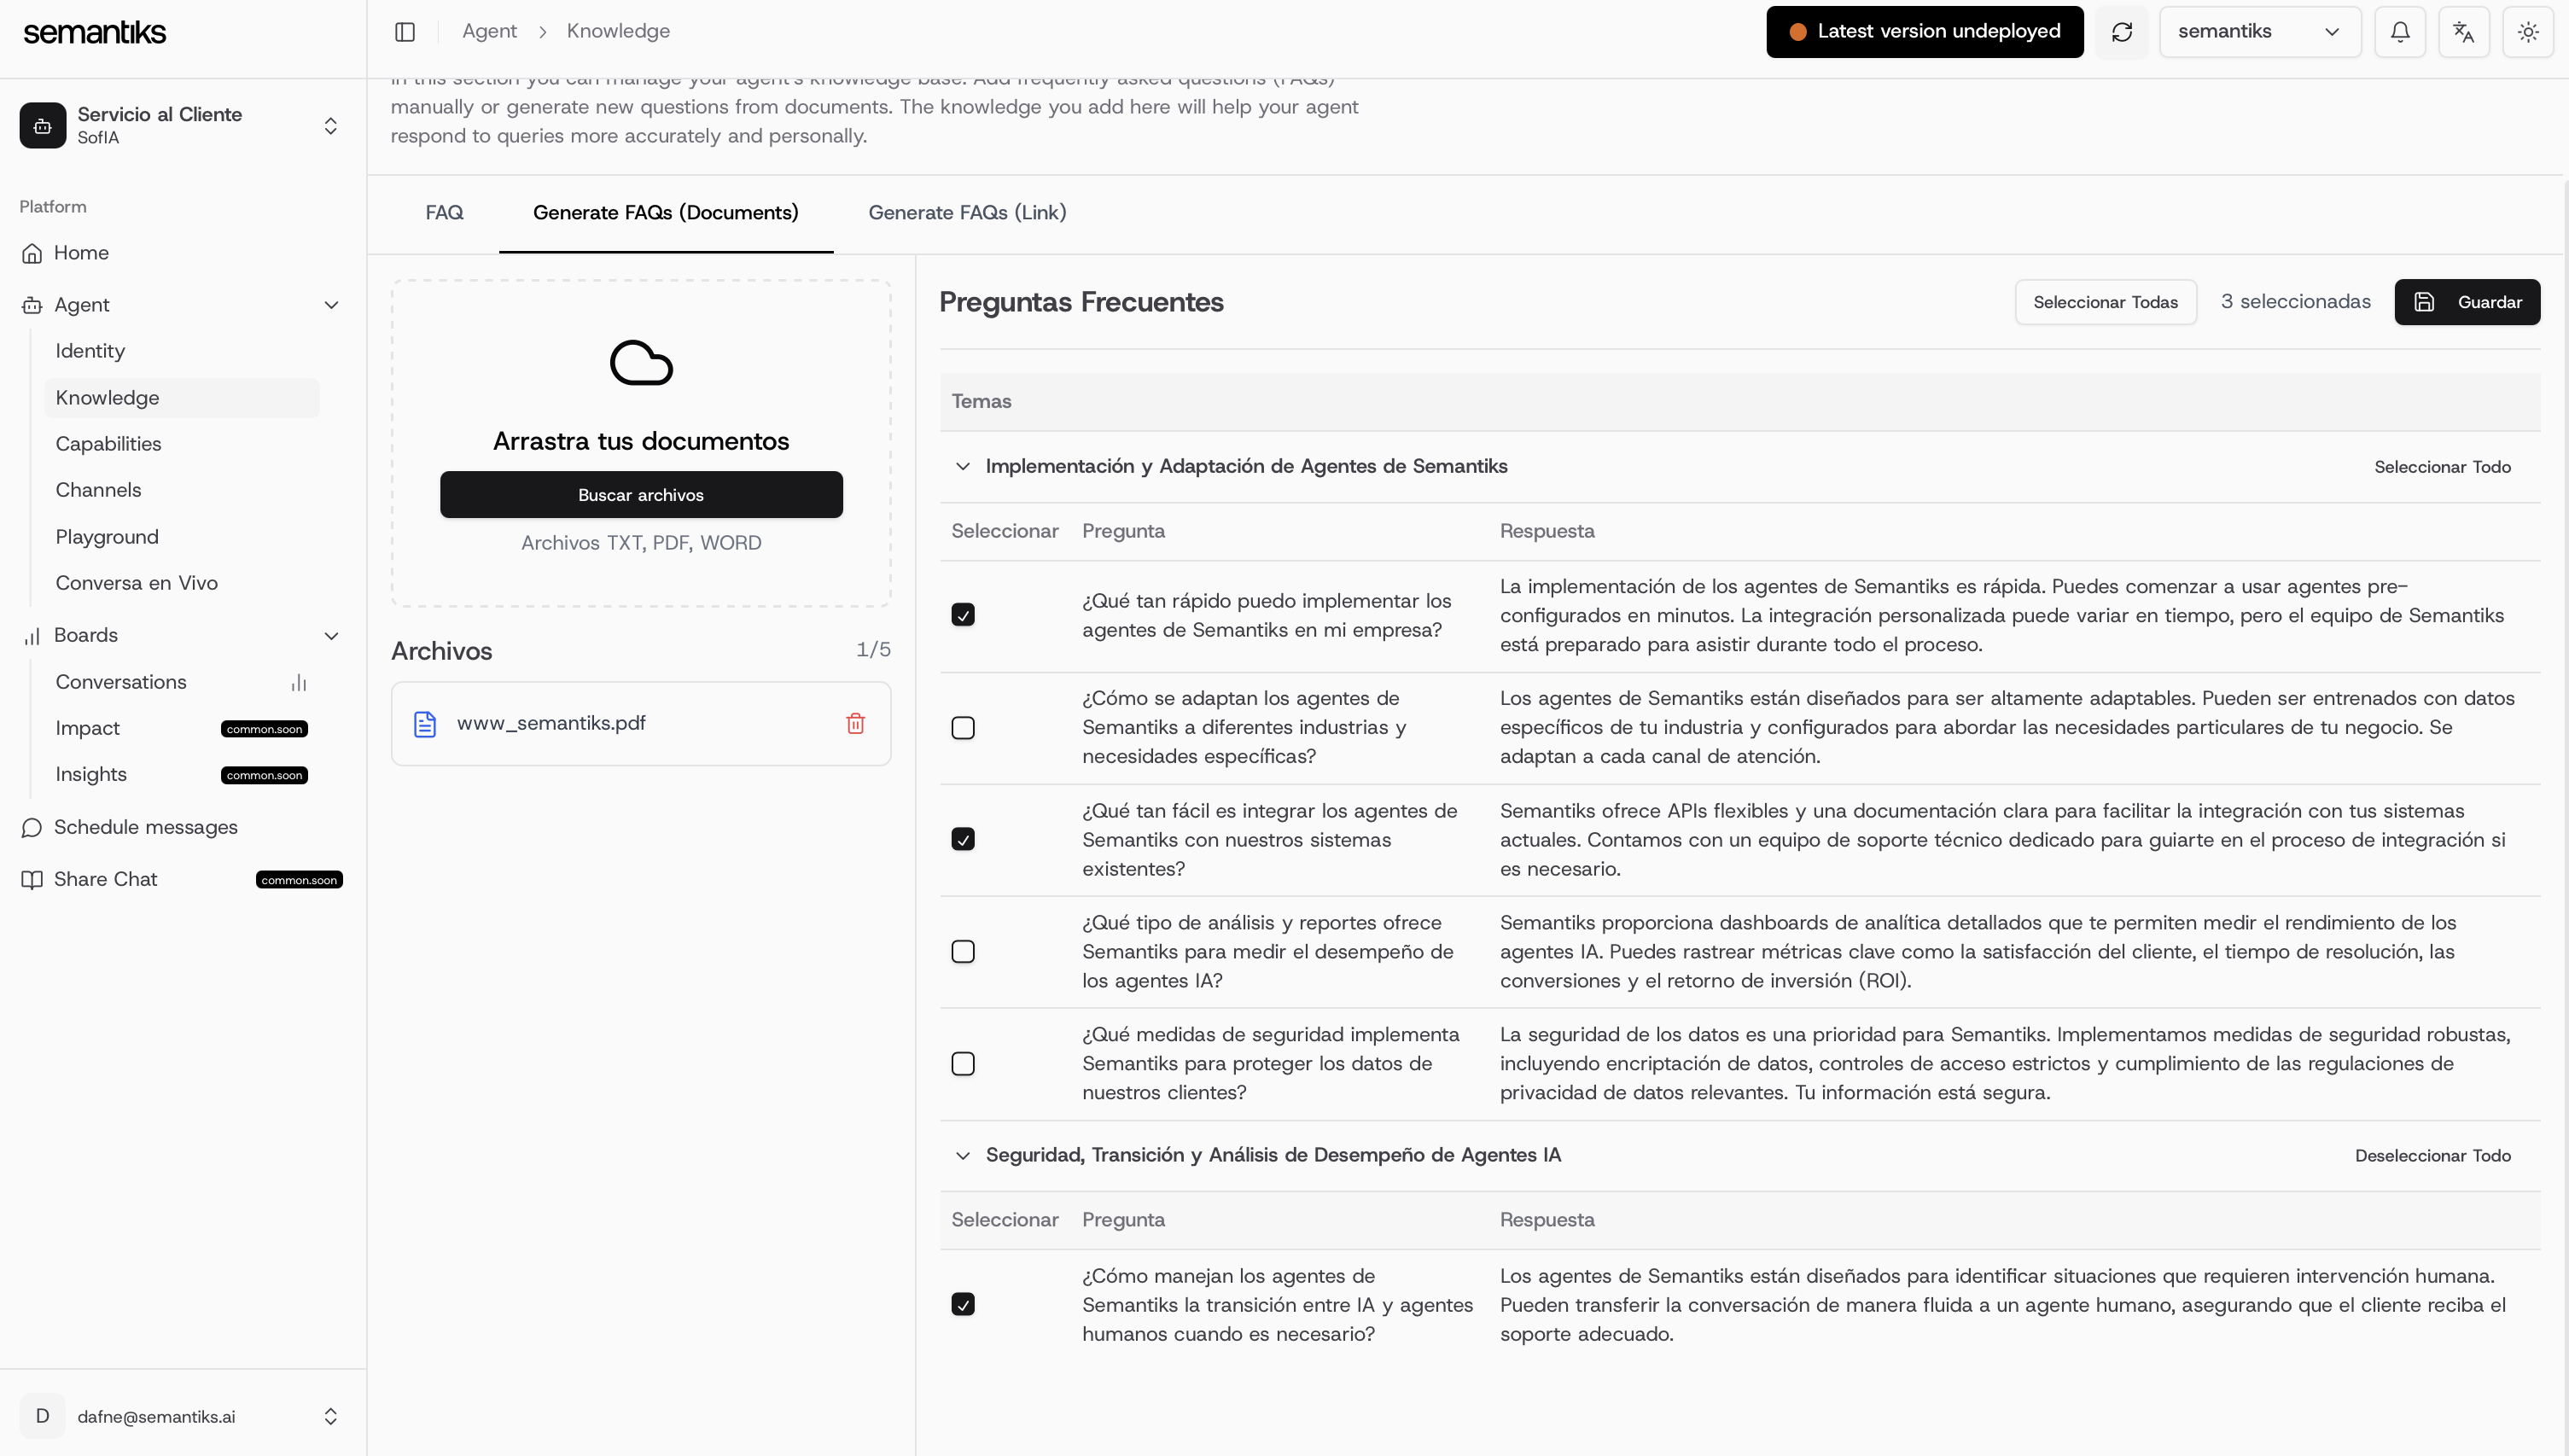
- Extract FAQs from documents (Automatically generates Topics)
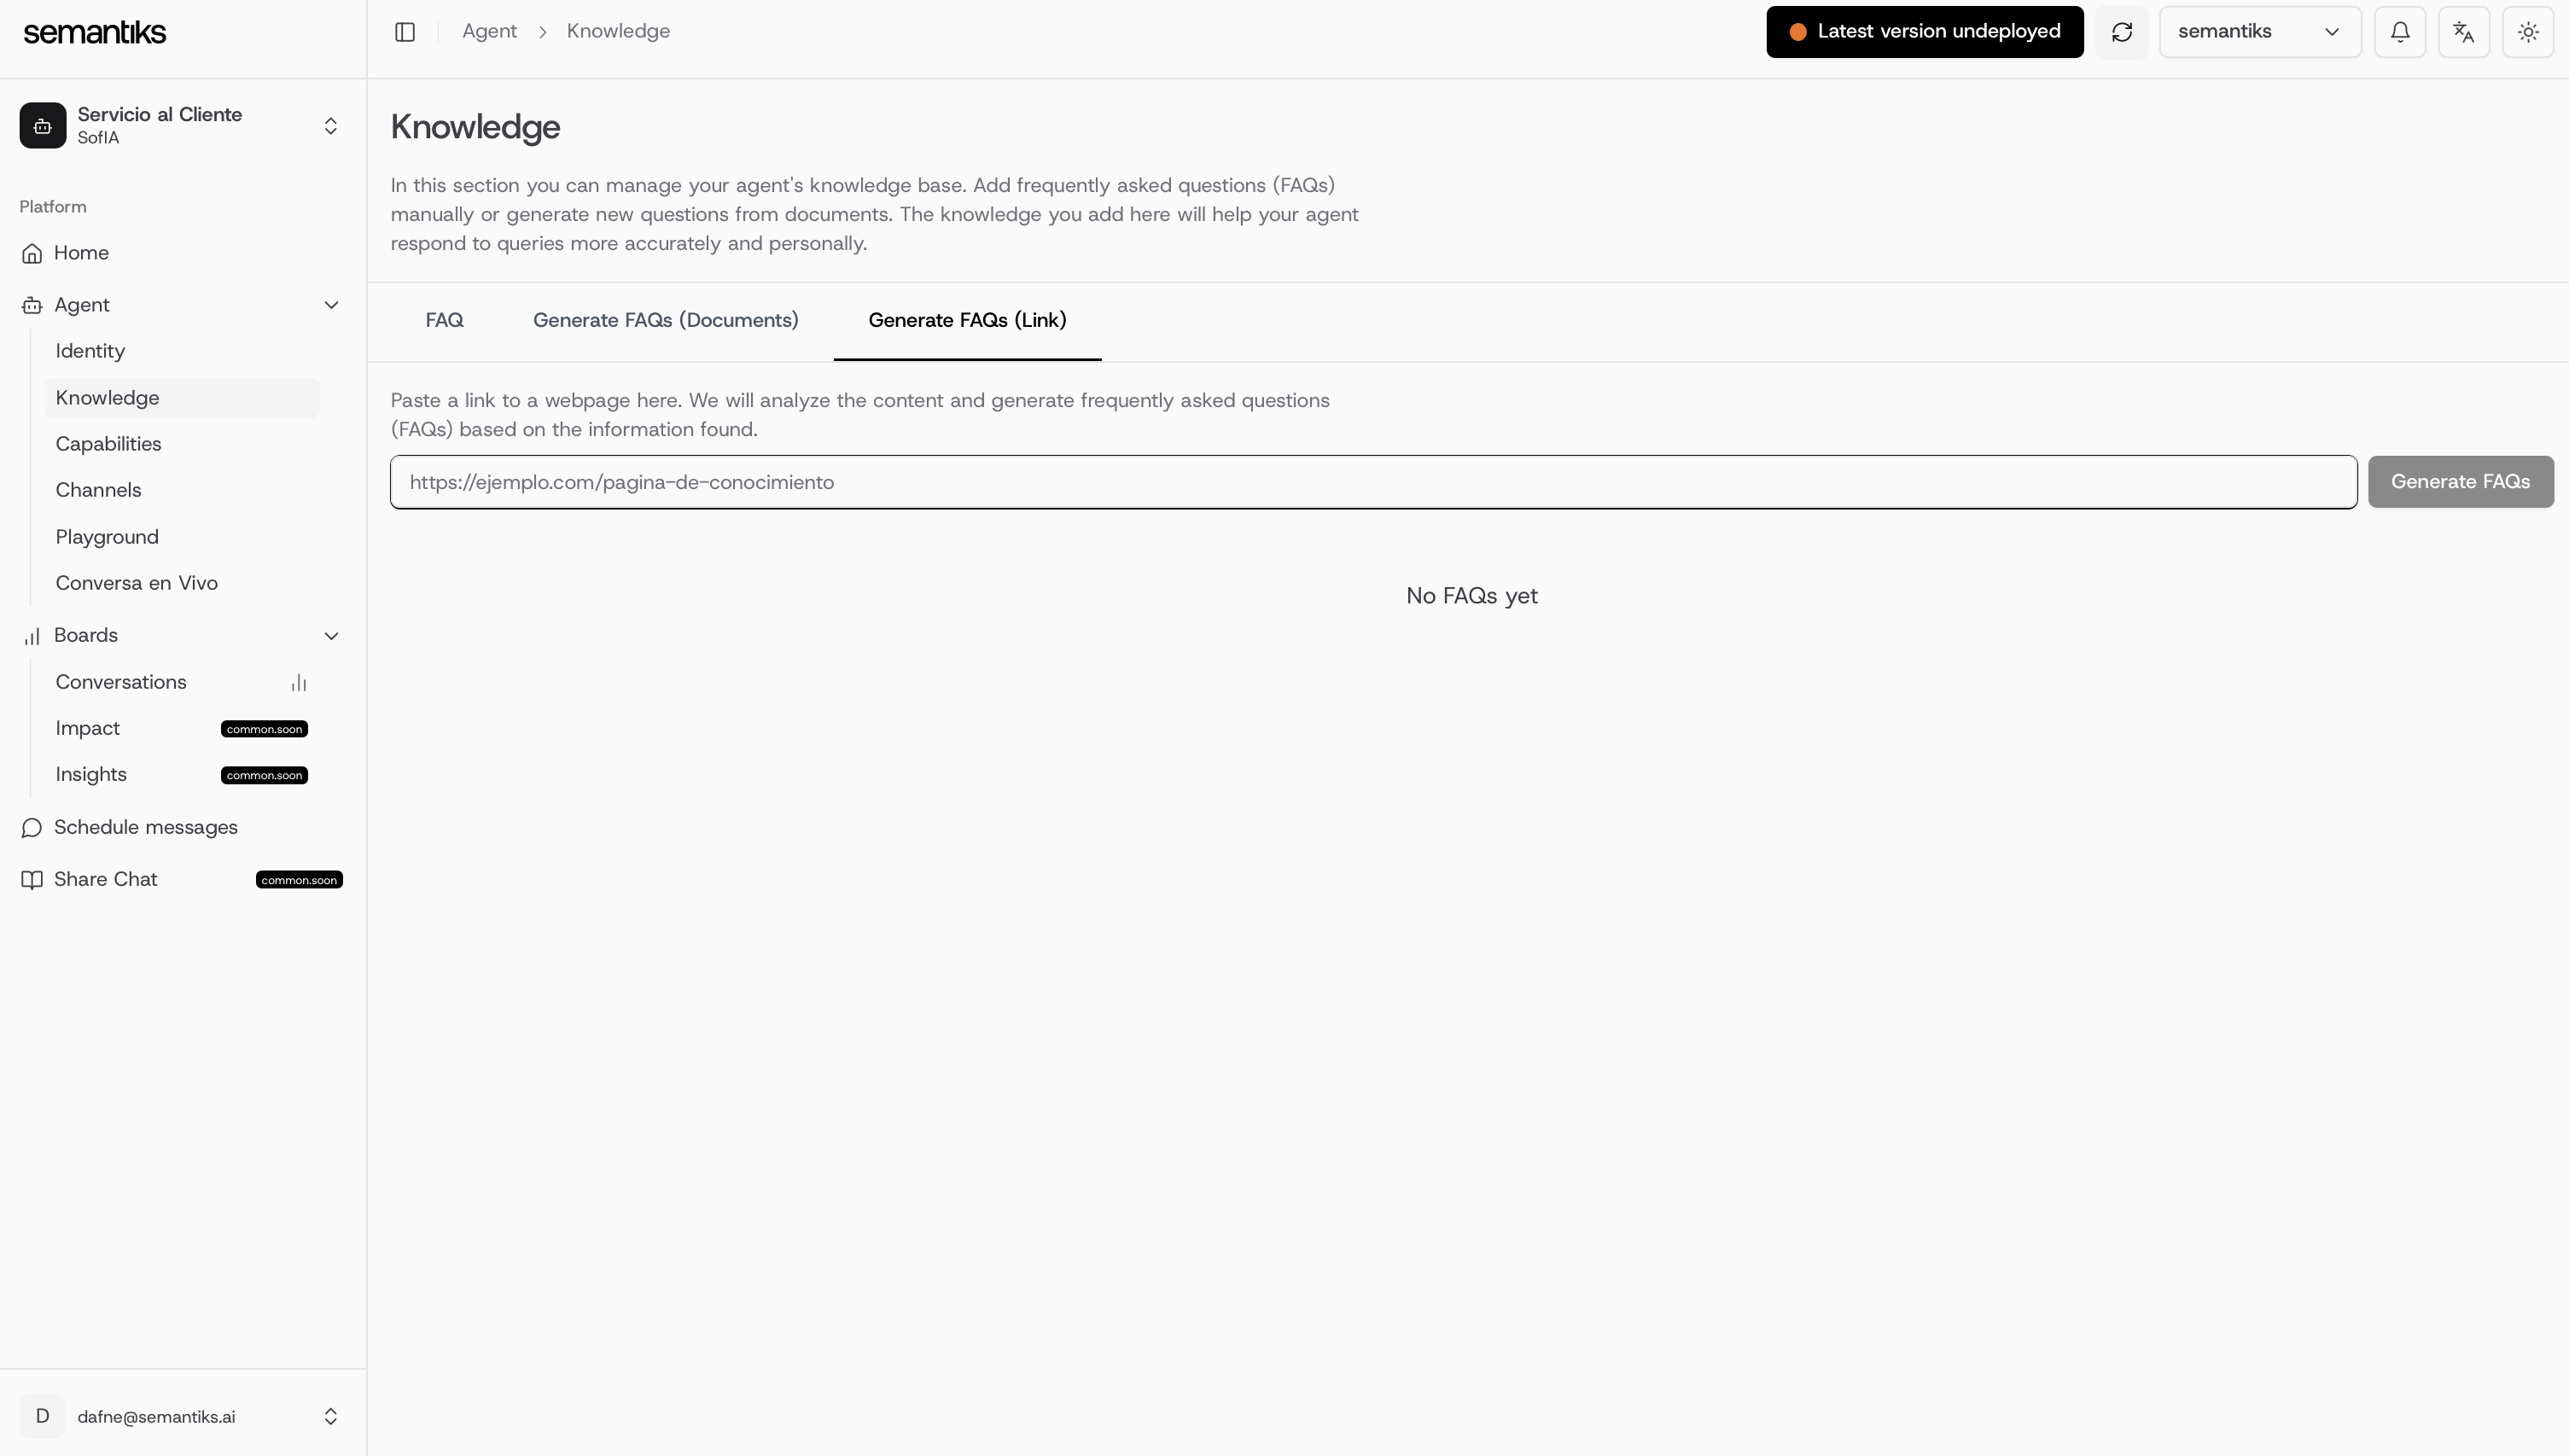
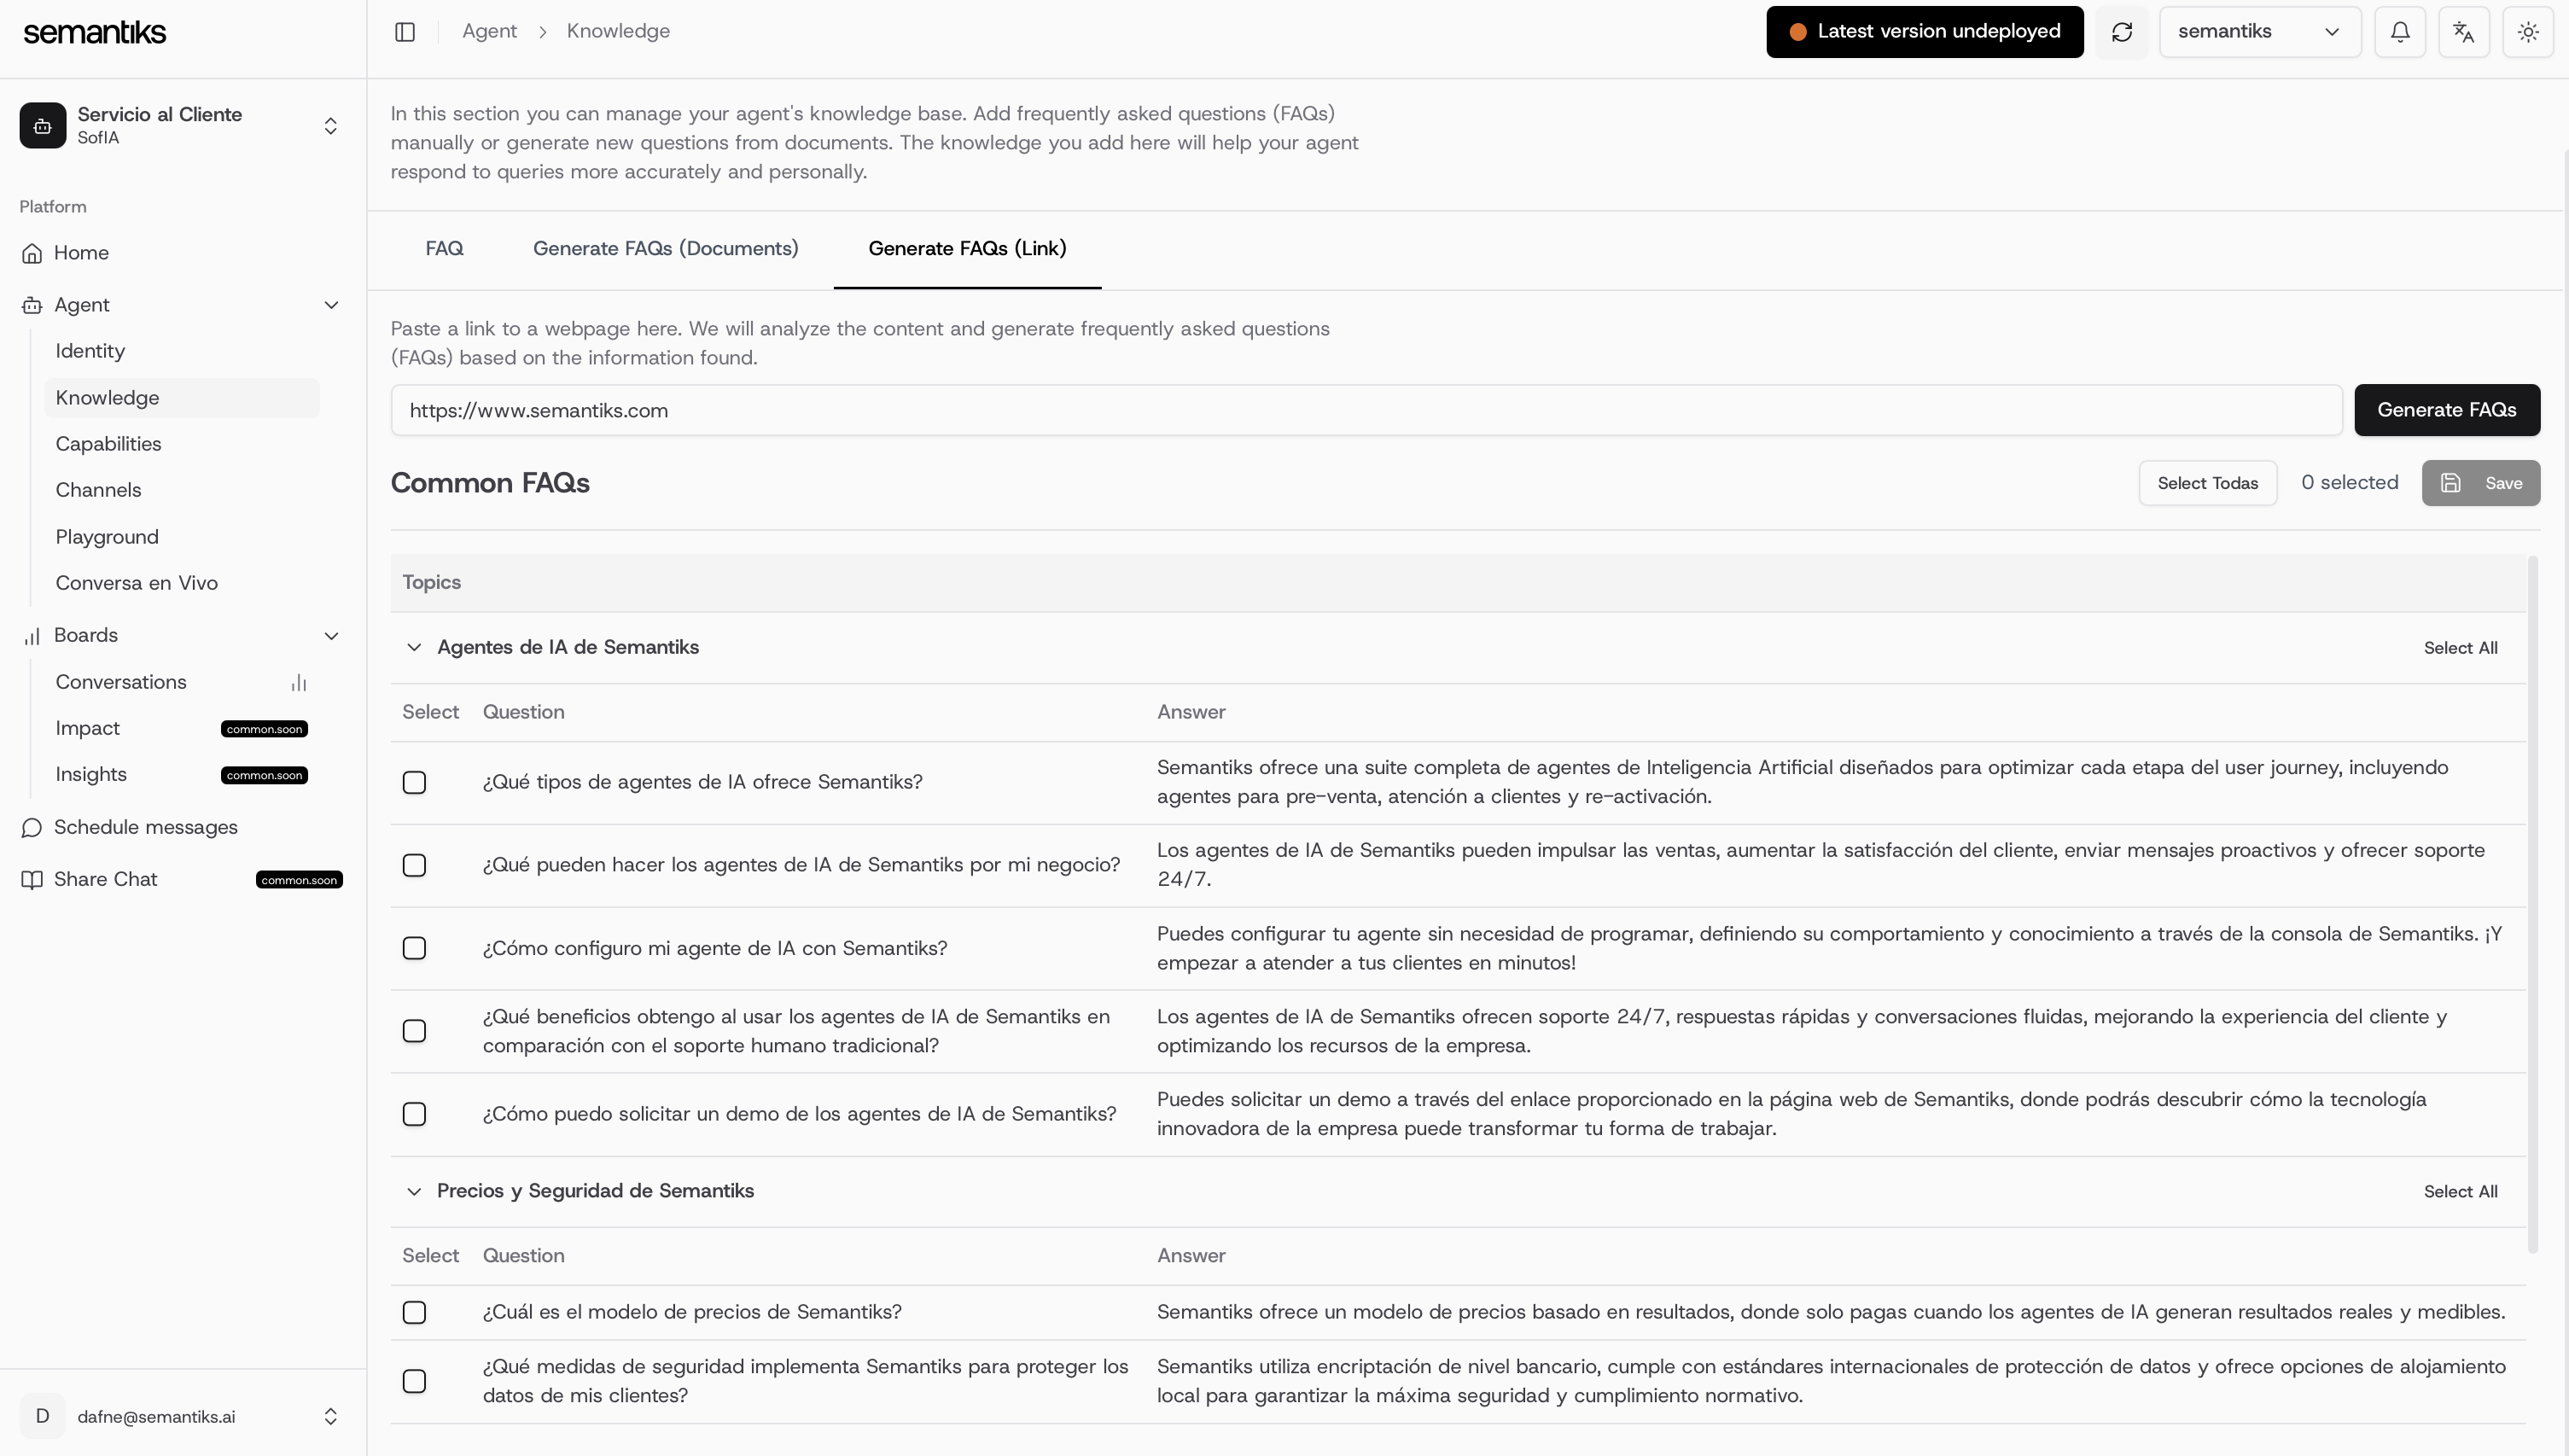
- Extract FAQs from a link (Automatically generates Topics)
FAQs Manual Insert
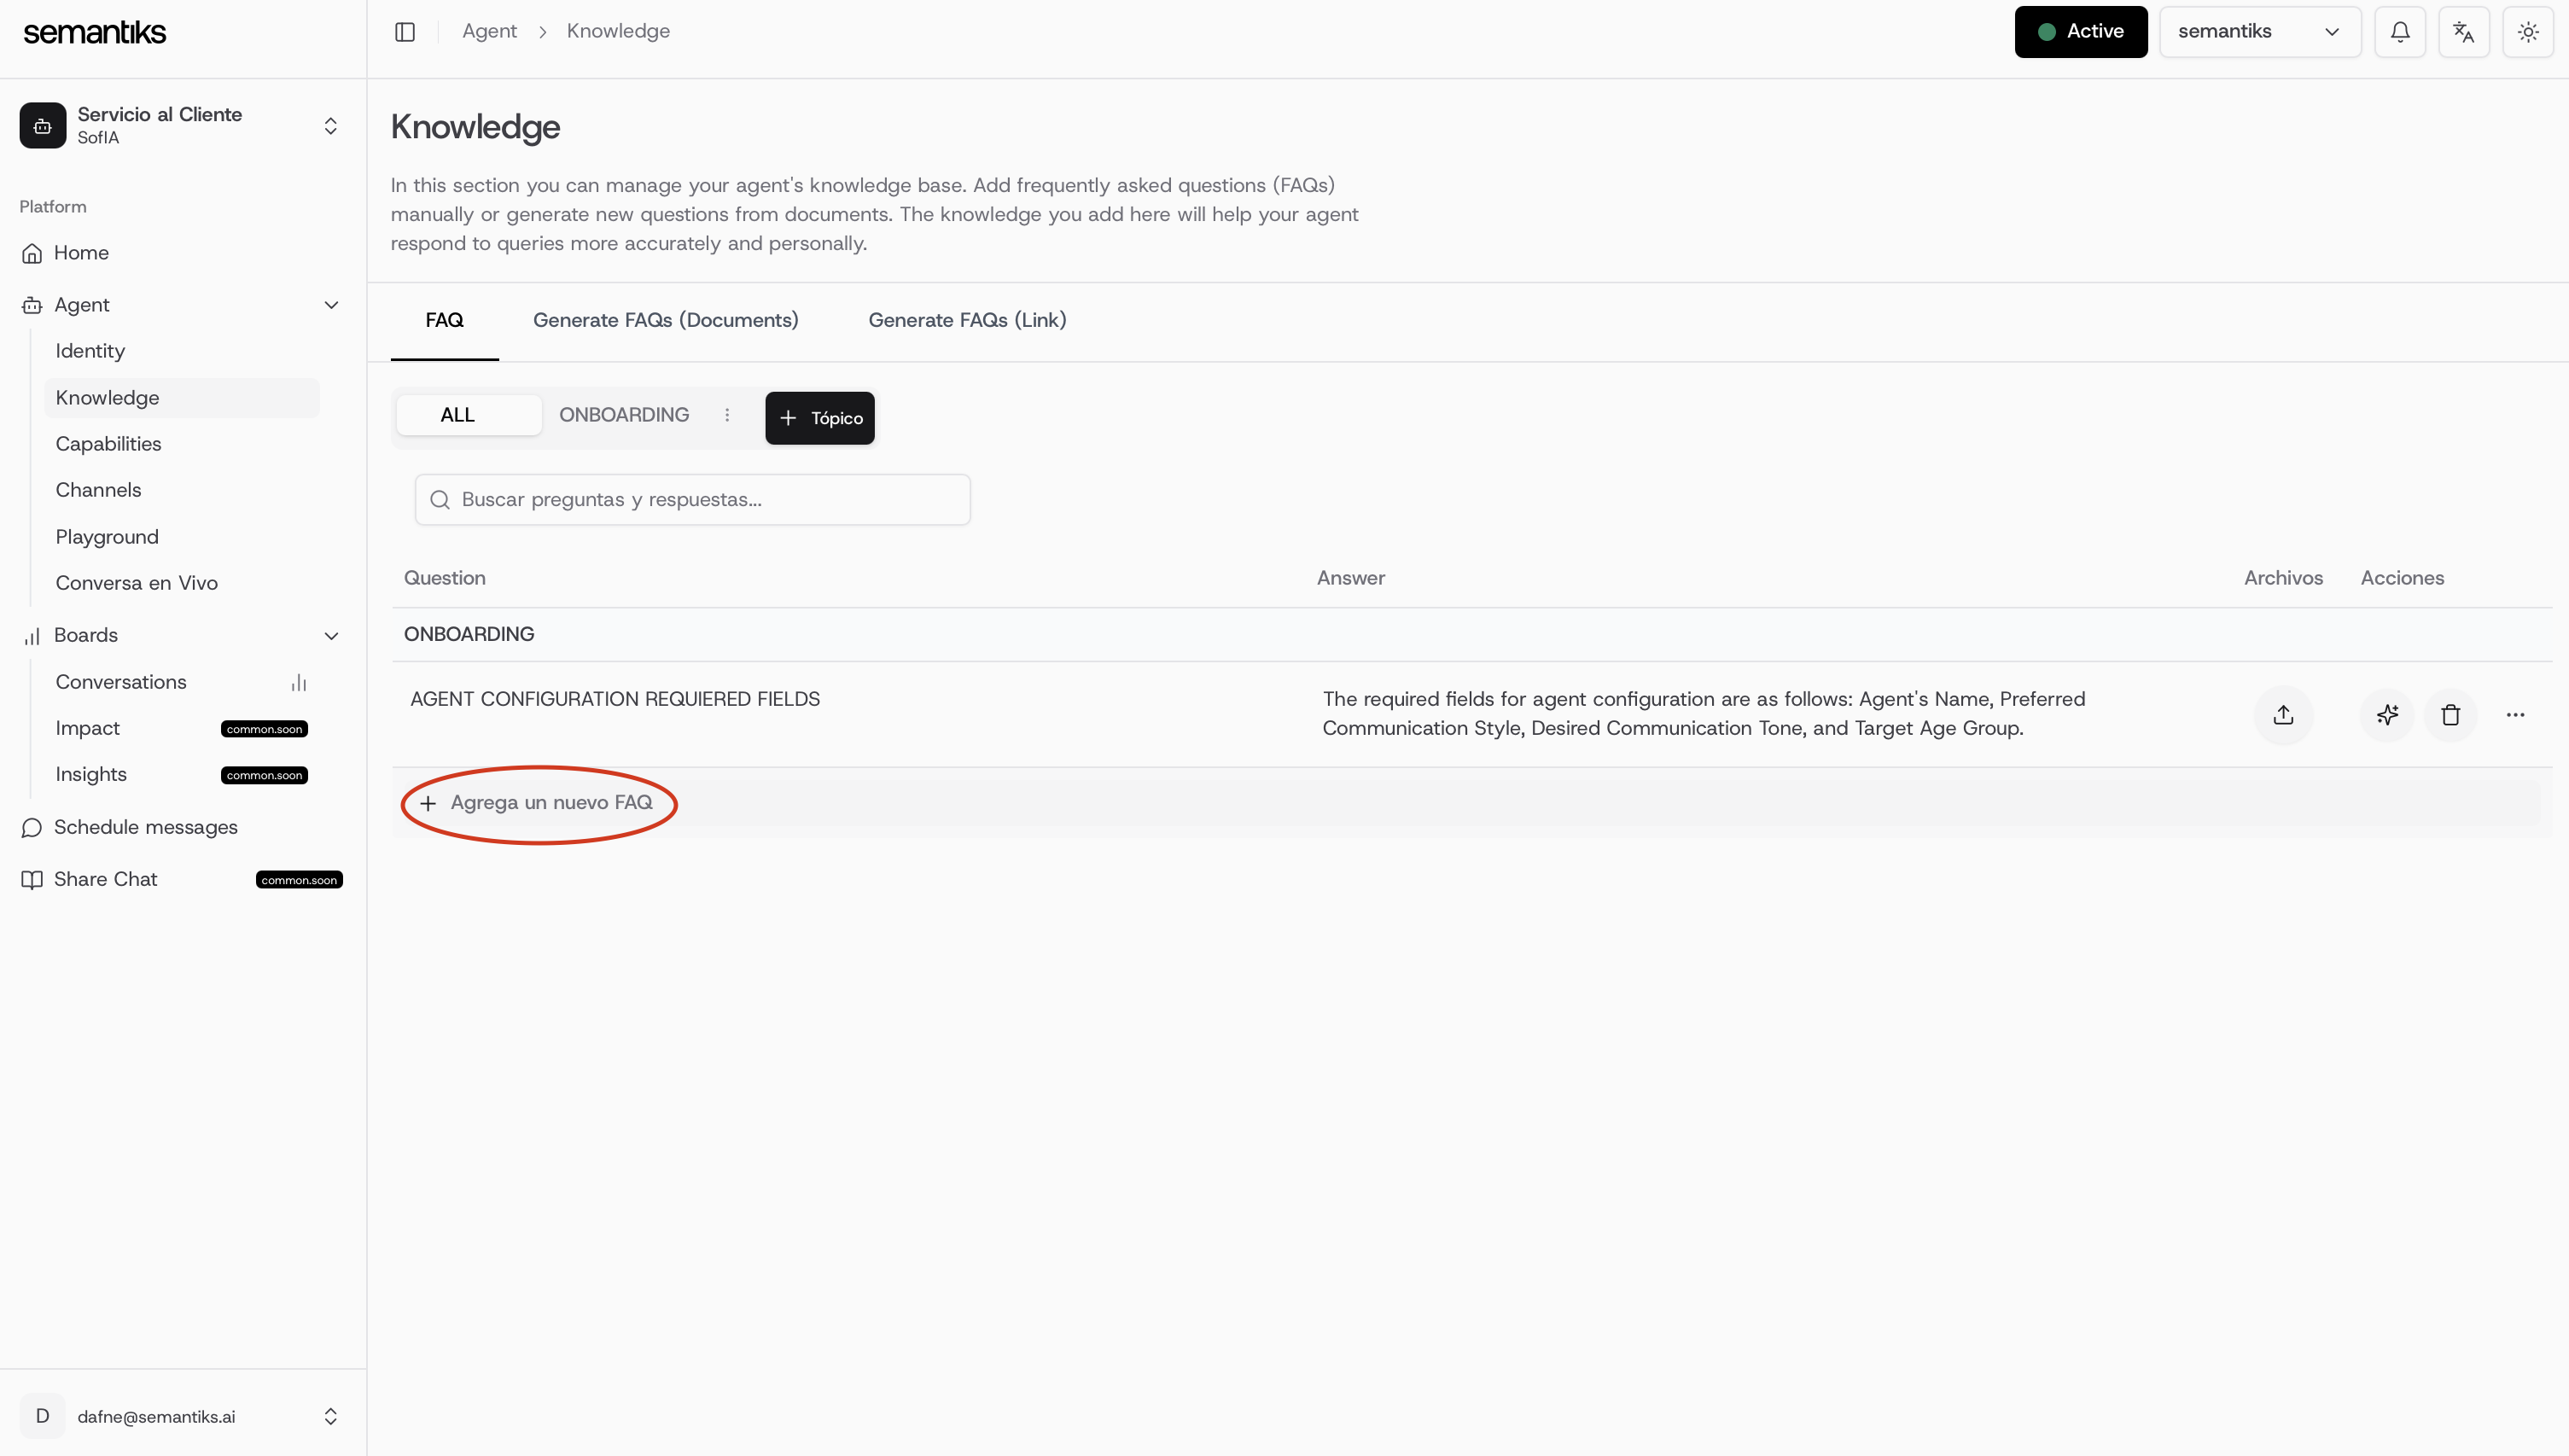
Manual FAQ insertion is extremely easy and involves just three simple steps:Enter the question, provide the answer, and click save.
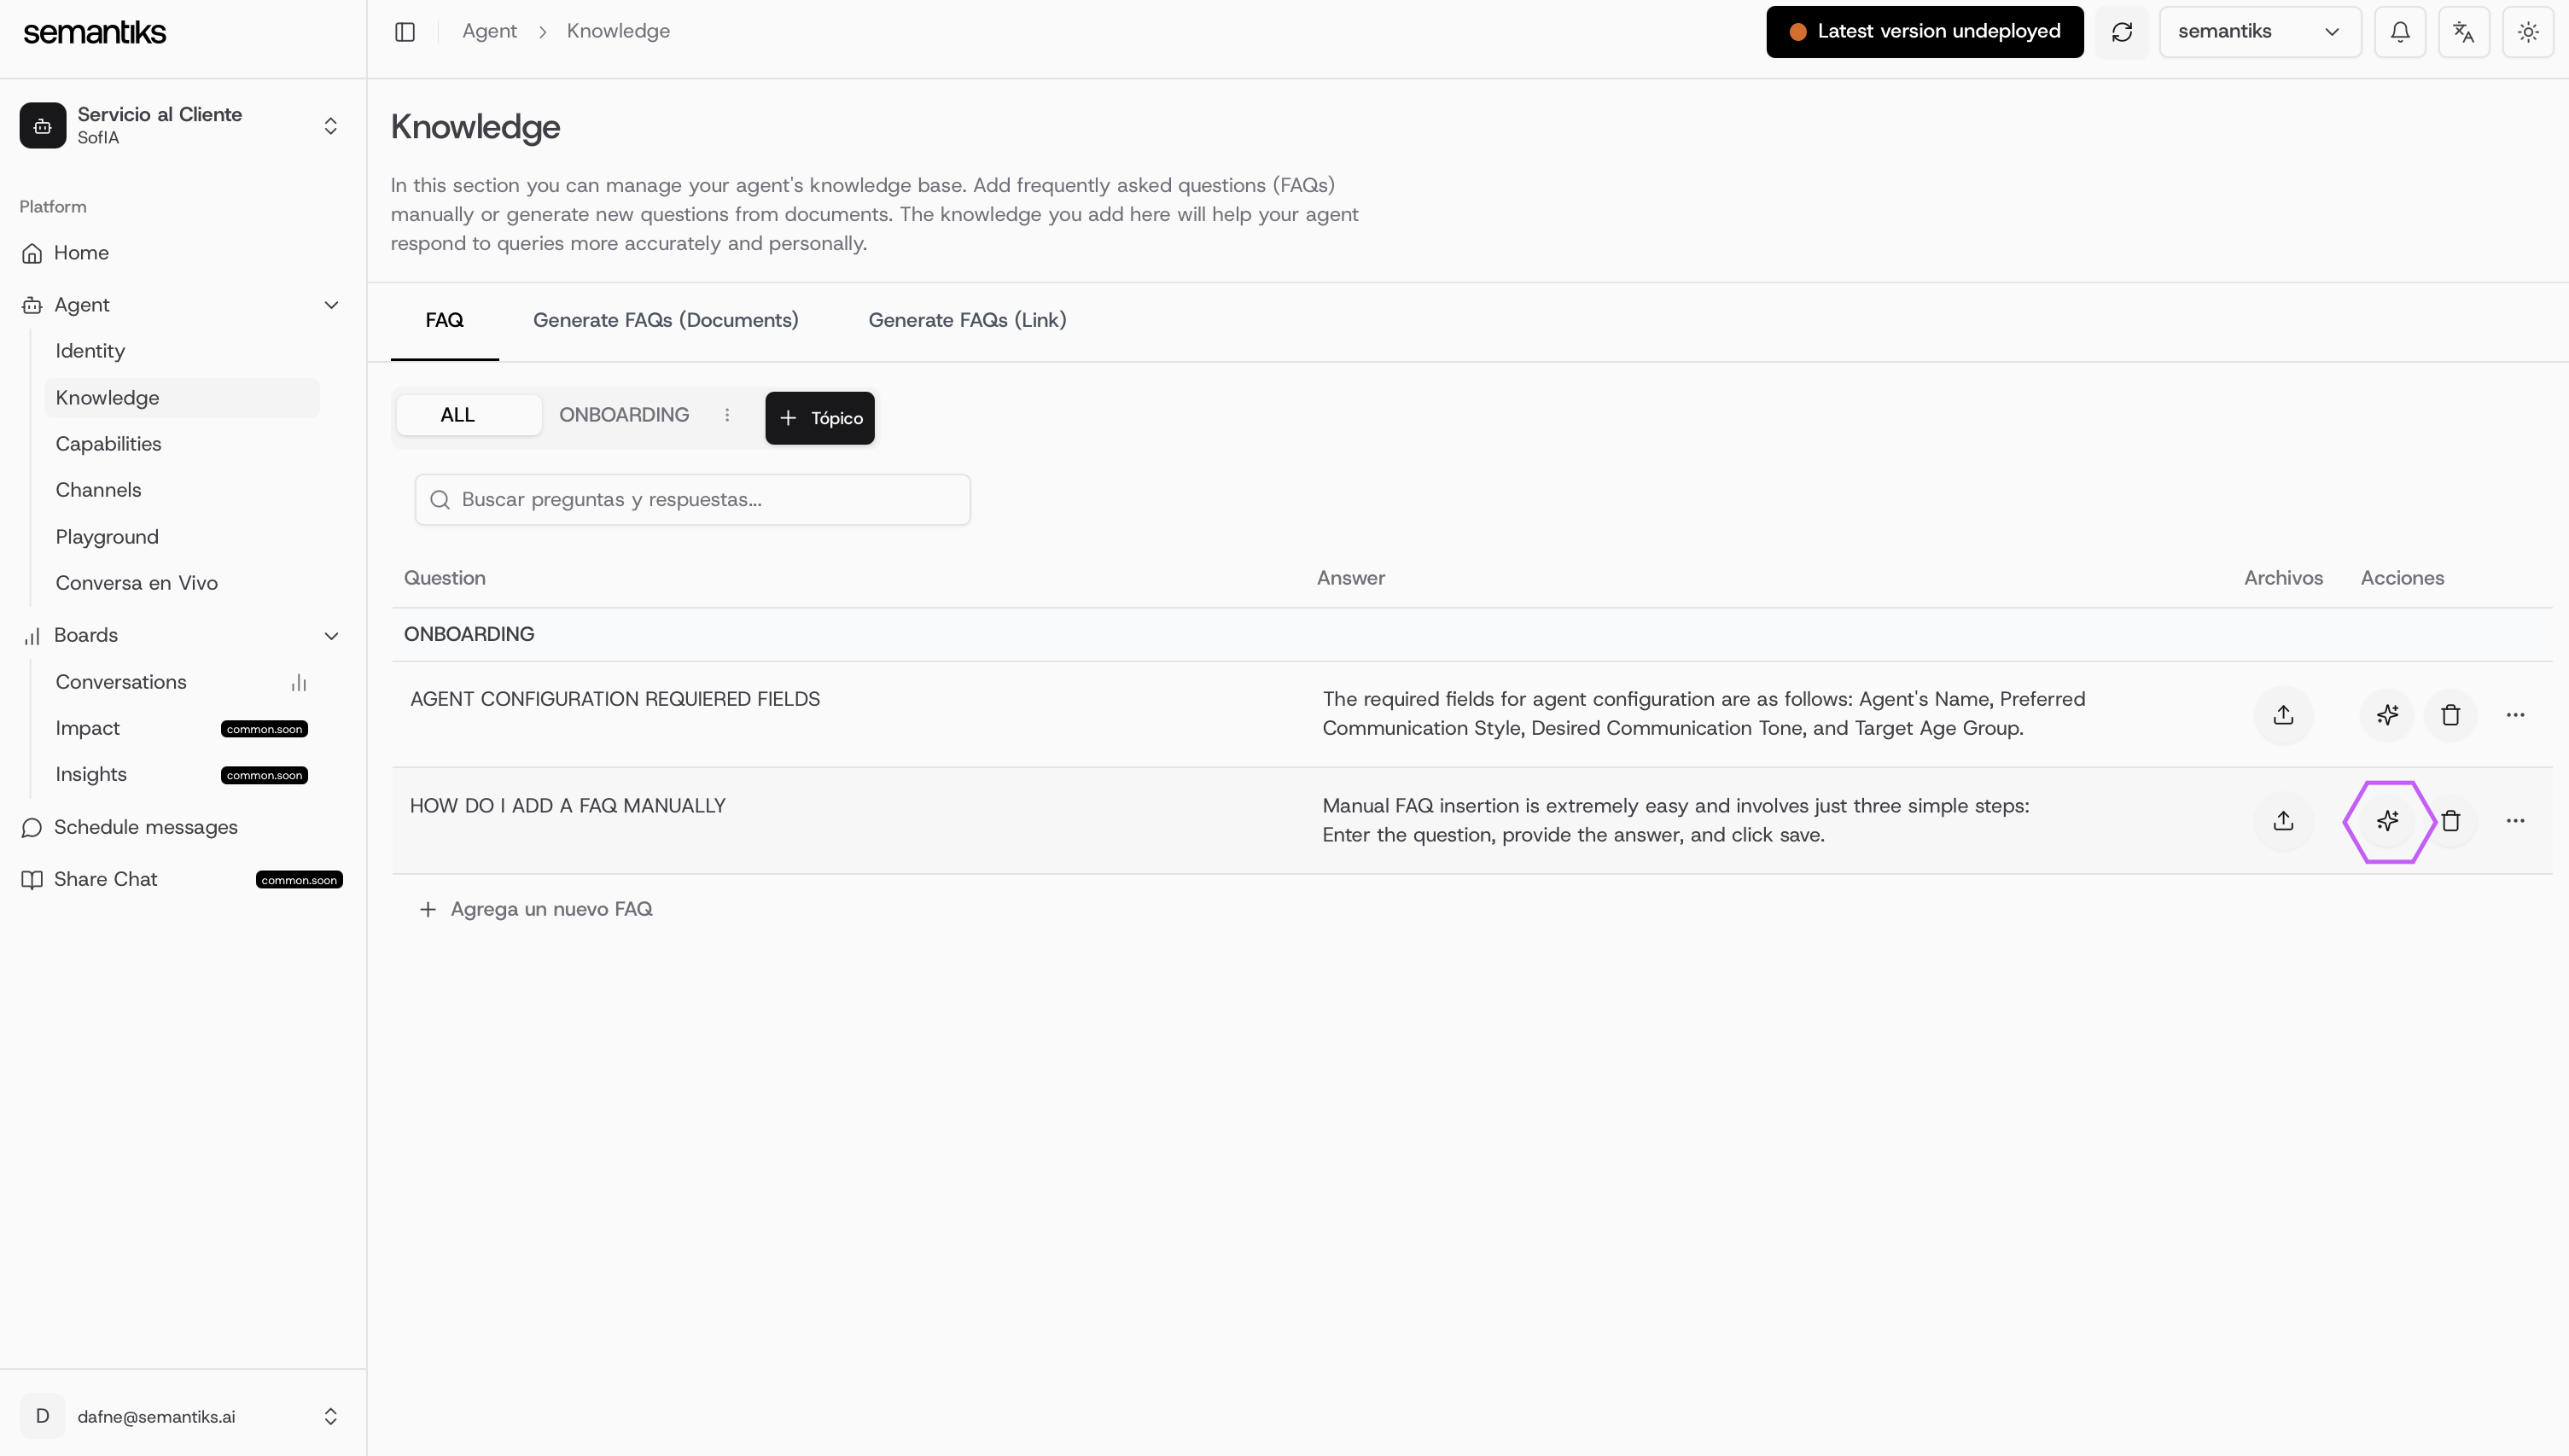
It keeps the original meaning intact while improving grammar, clarity, and overall phrasing to ensure everything is well-written and easy to understand.
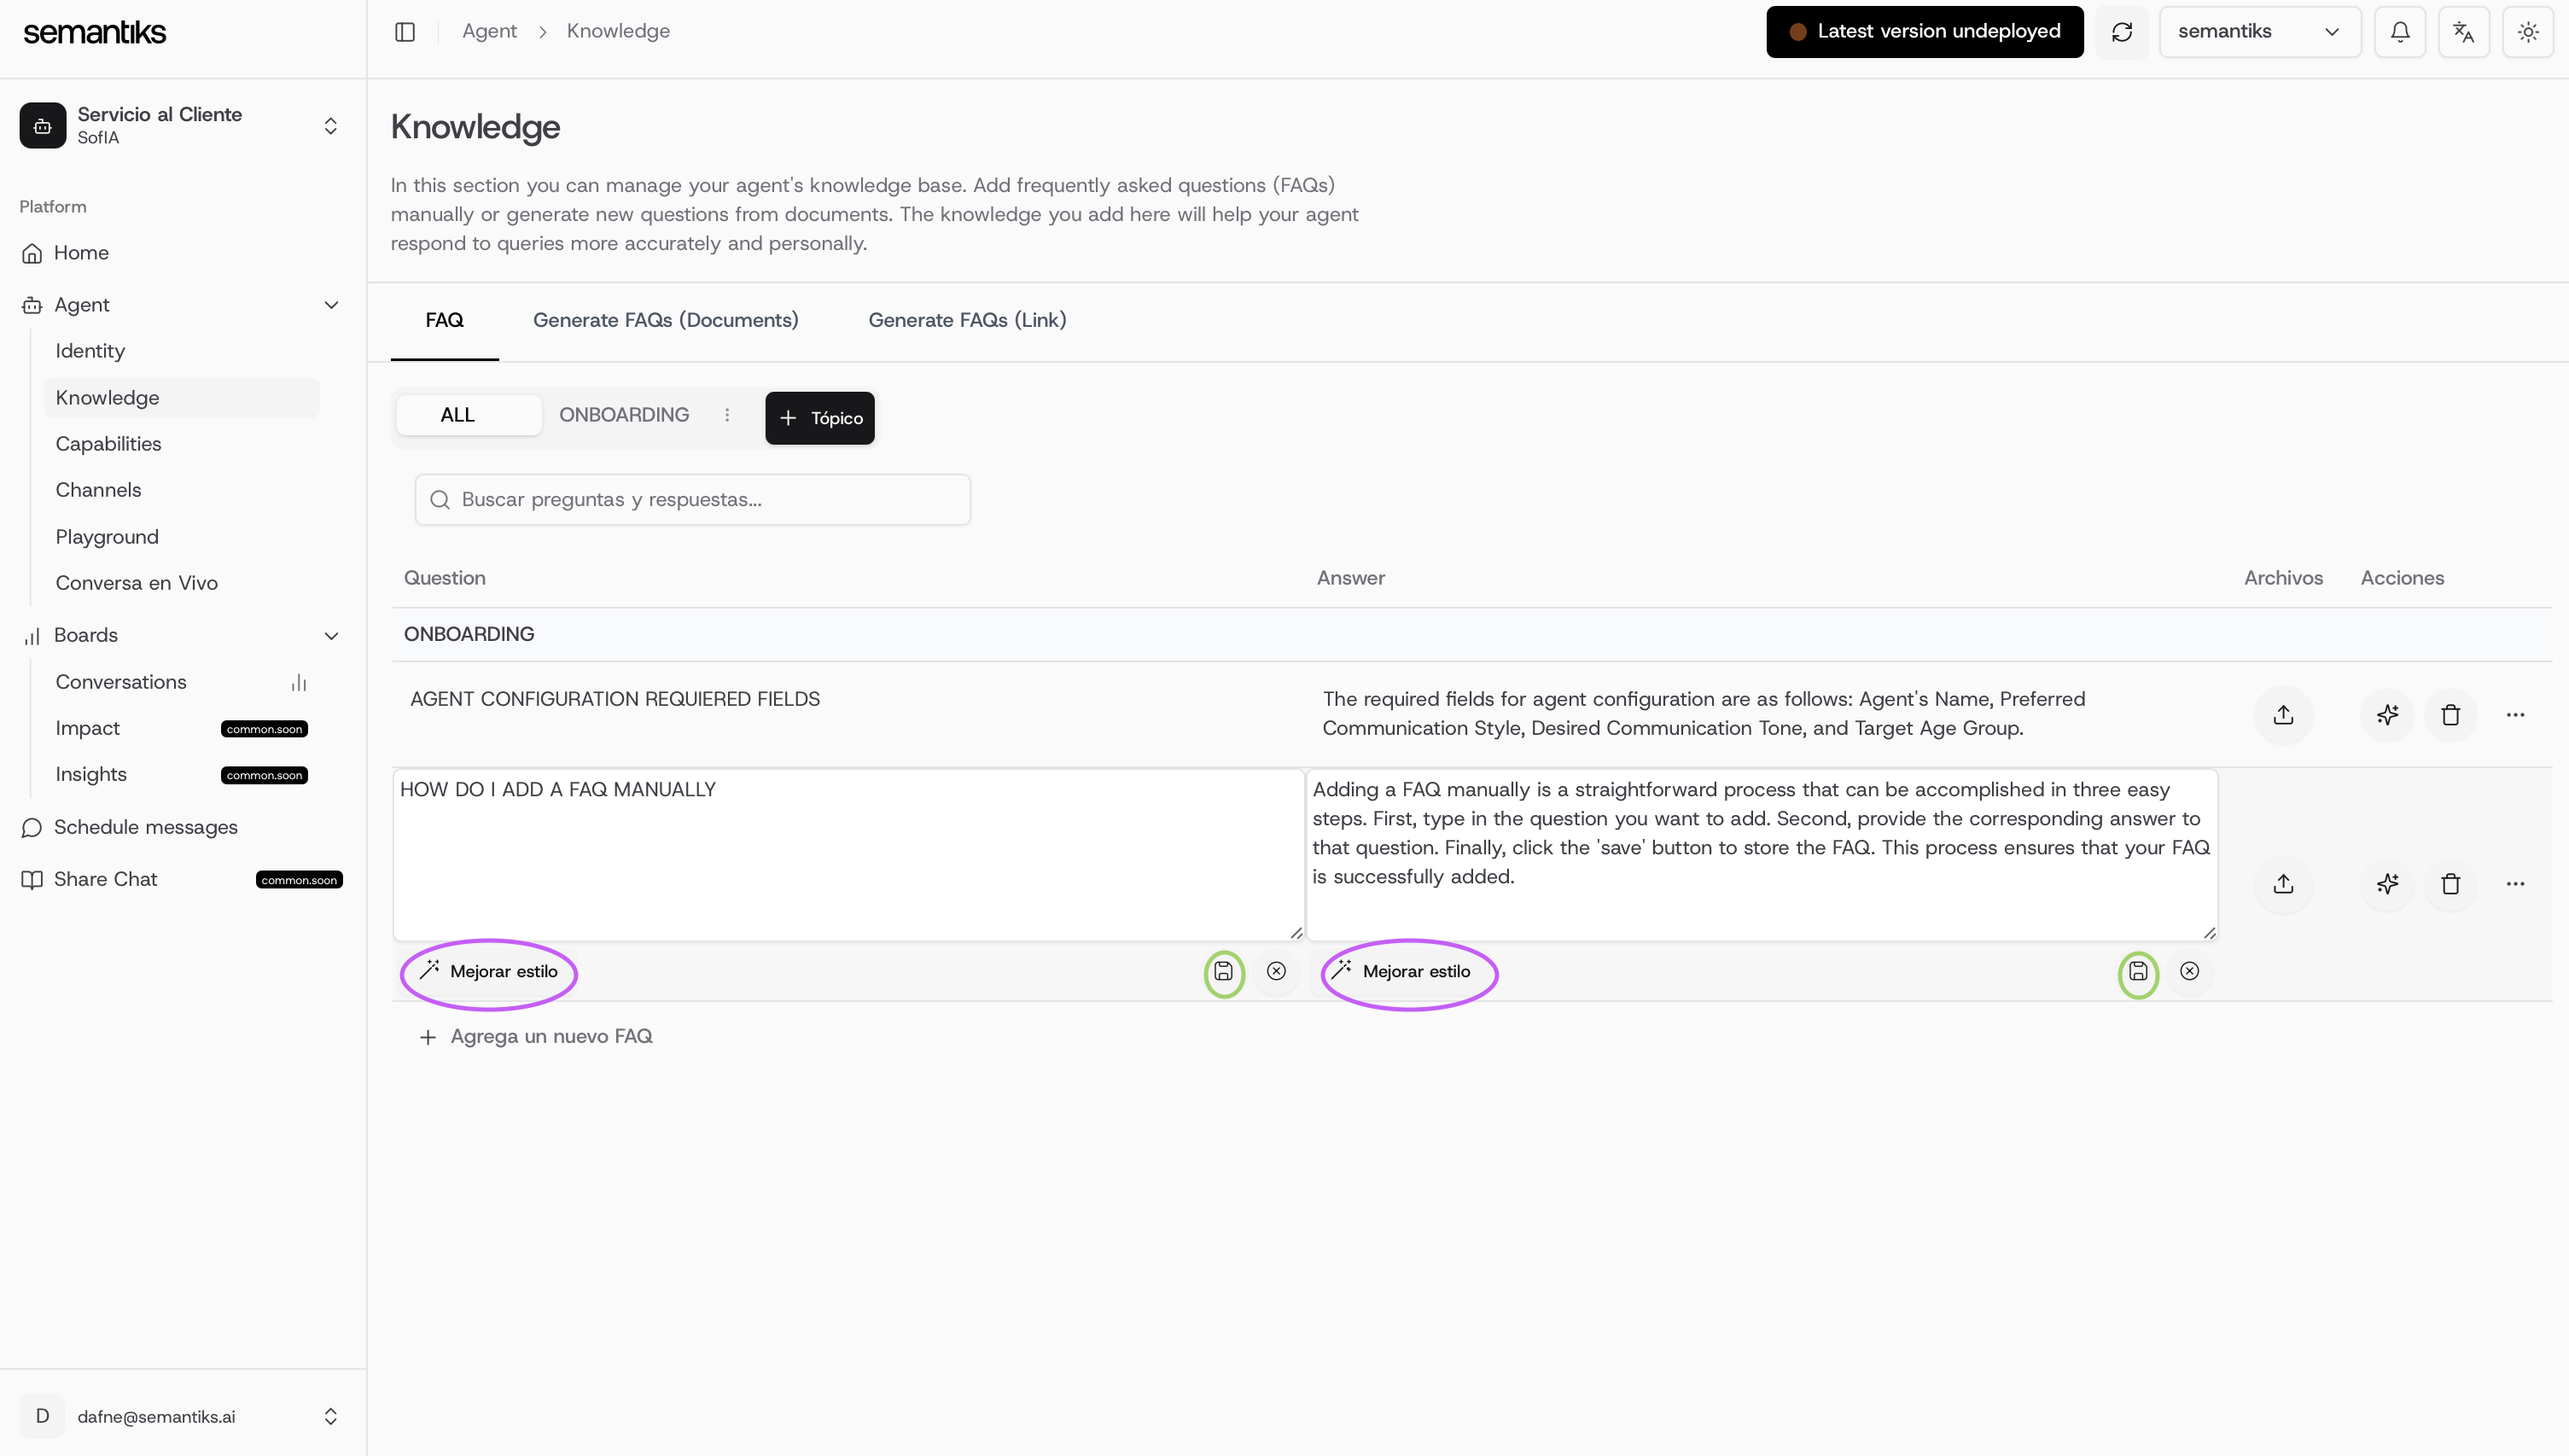
It works similarly, with one key difference: it improves either the question or the answer individually, rather than both at the same time.
Don’t forget to save your changes by clicking the Save button!
Otherwise, your improvements won’t be applied.
FAQs Document Insert
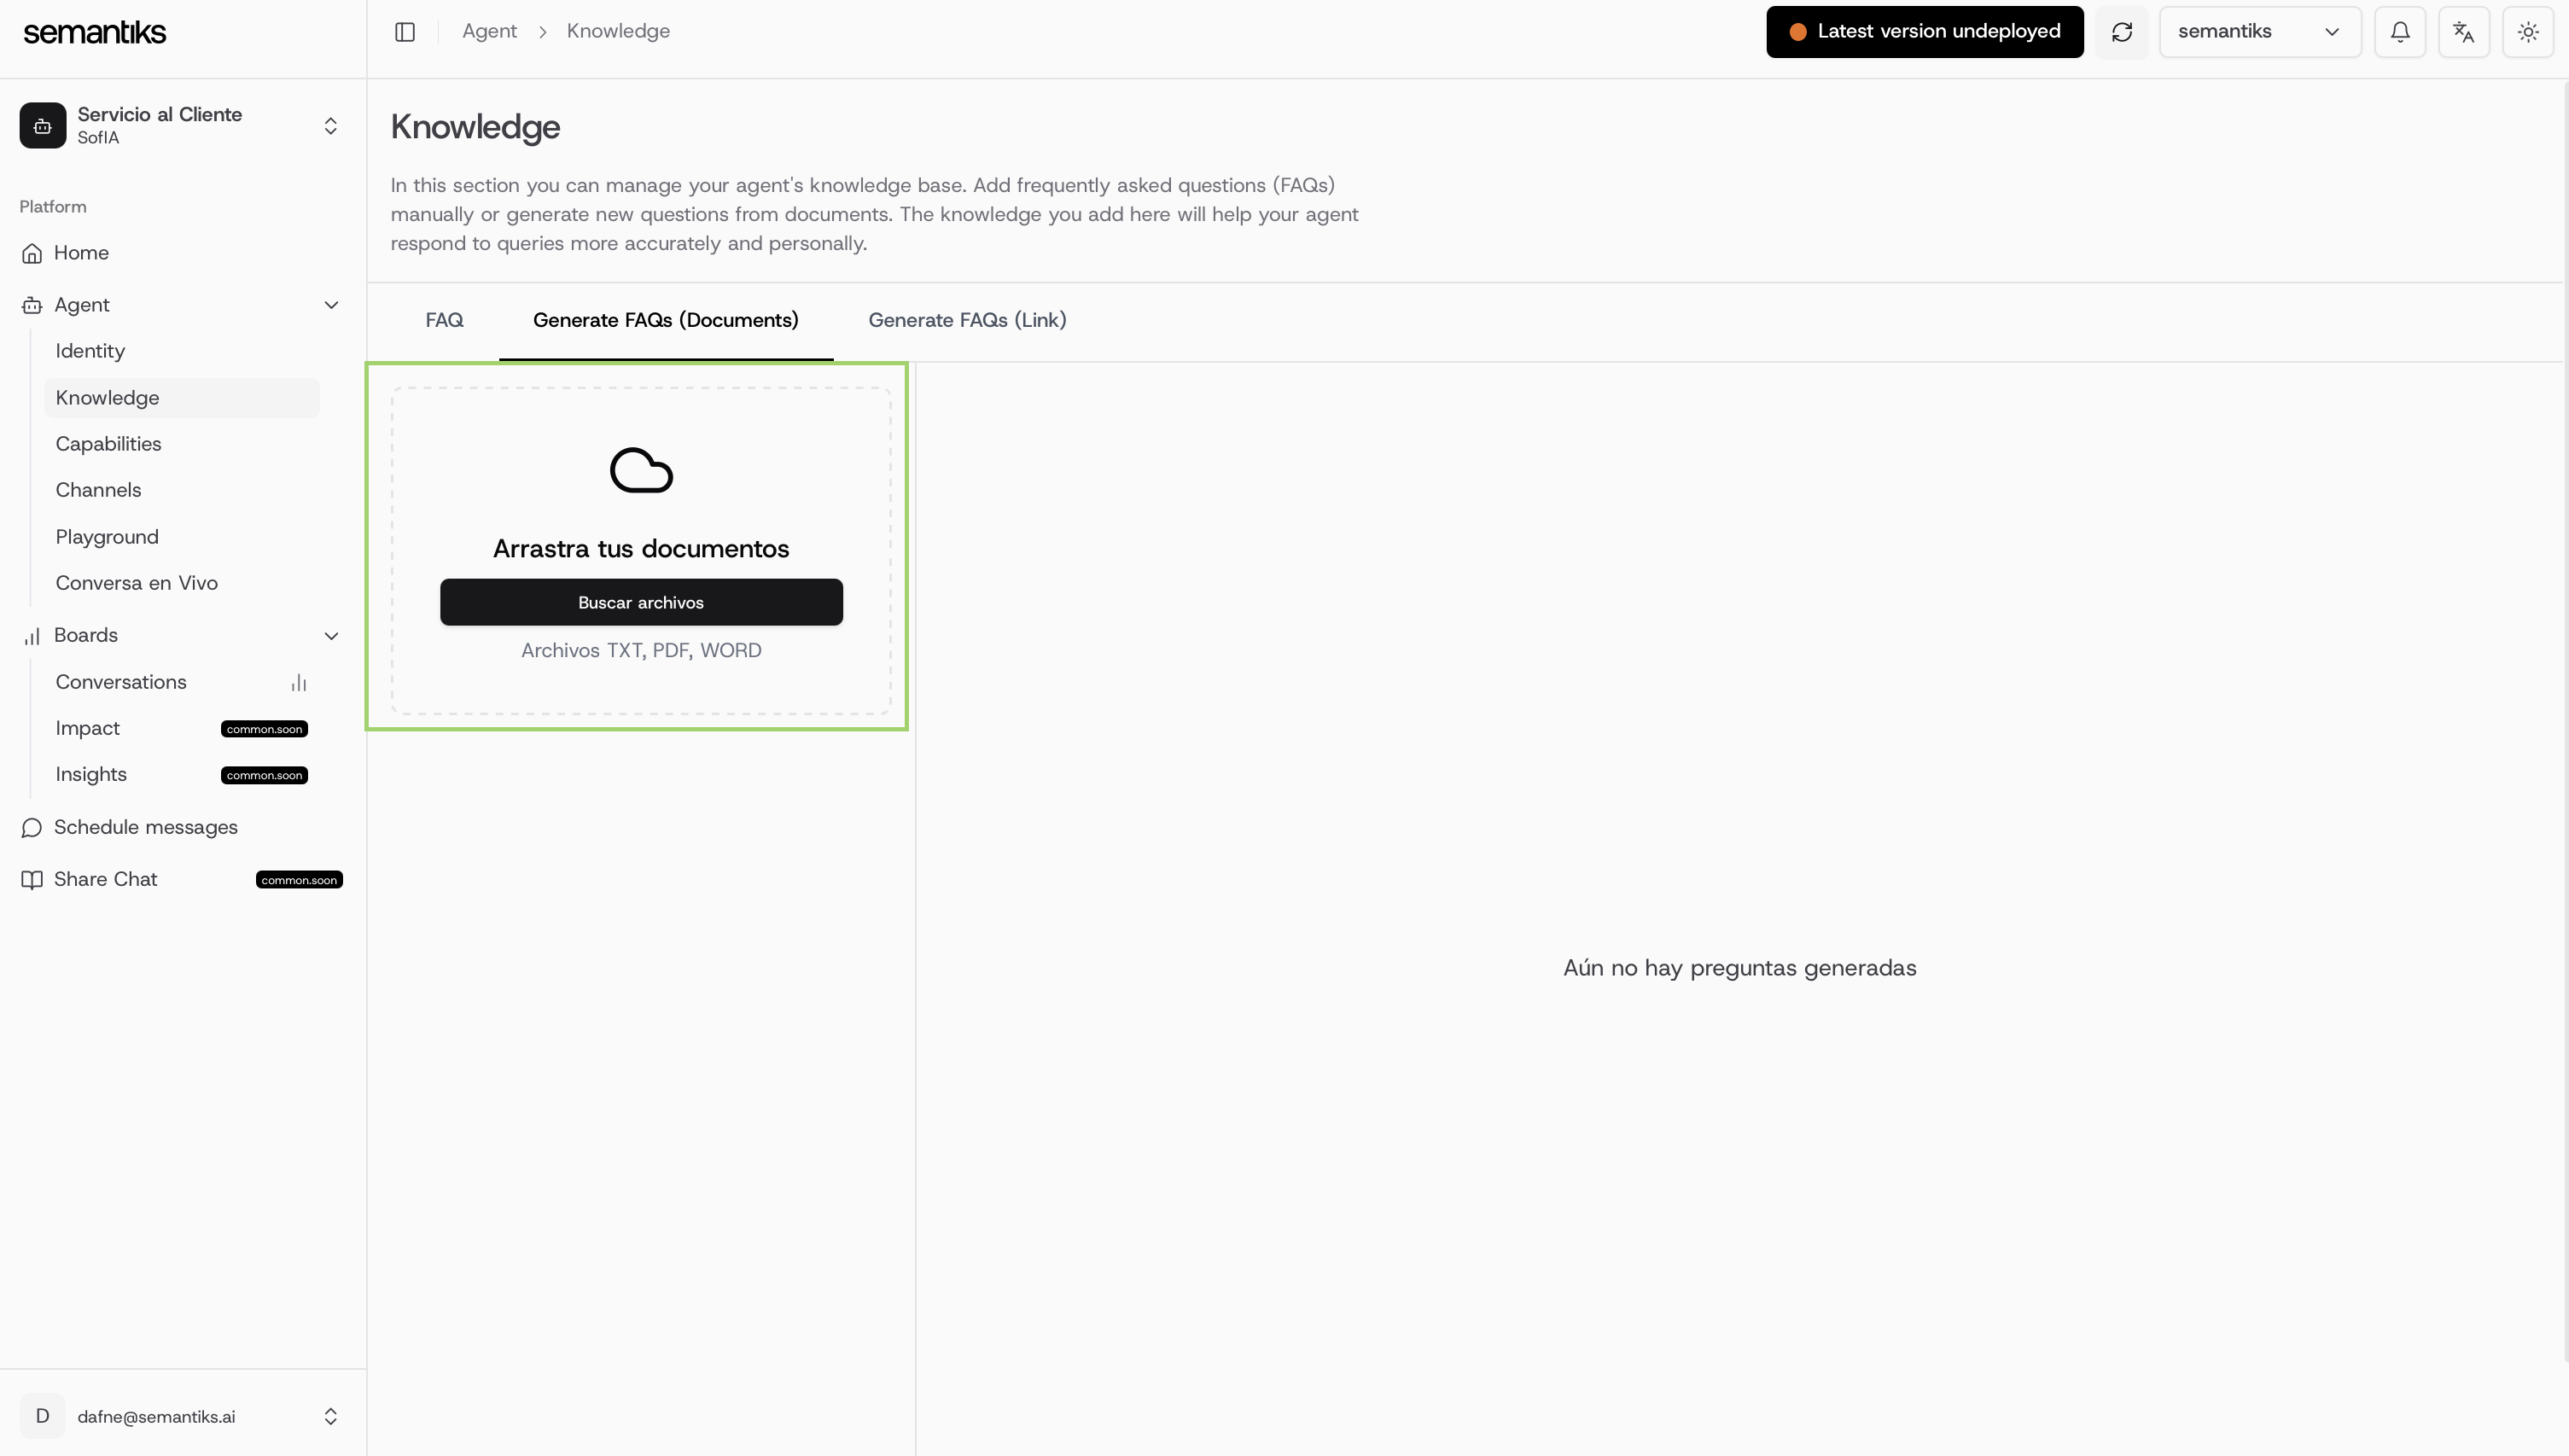
Generating FAQs from documents is even simpler!Just drag and drop your files or click Find File to upload up to 5 documents. The system will automatically generate FAQs based on their content.
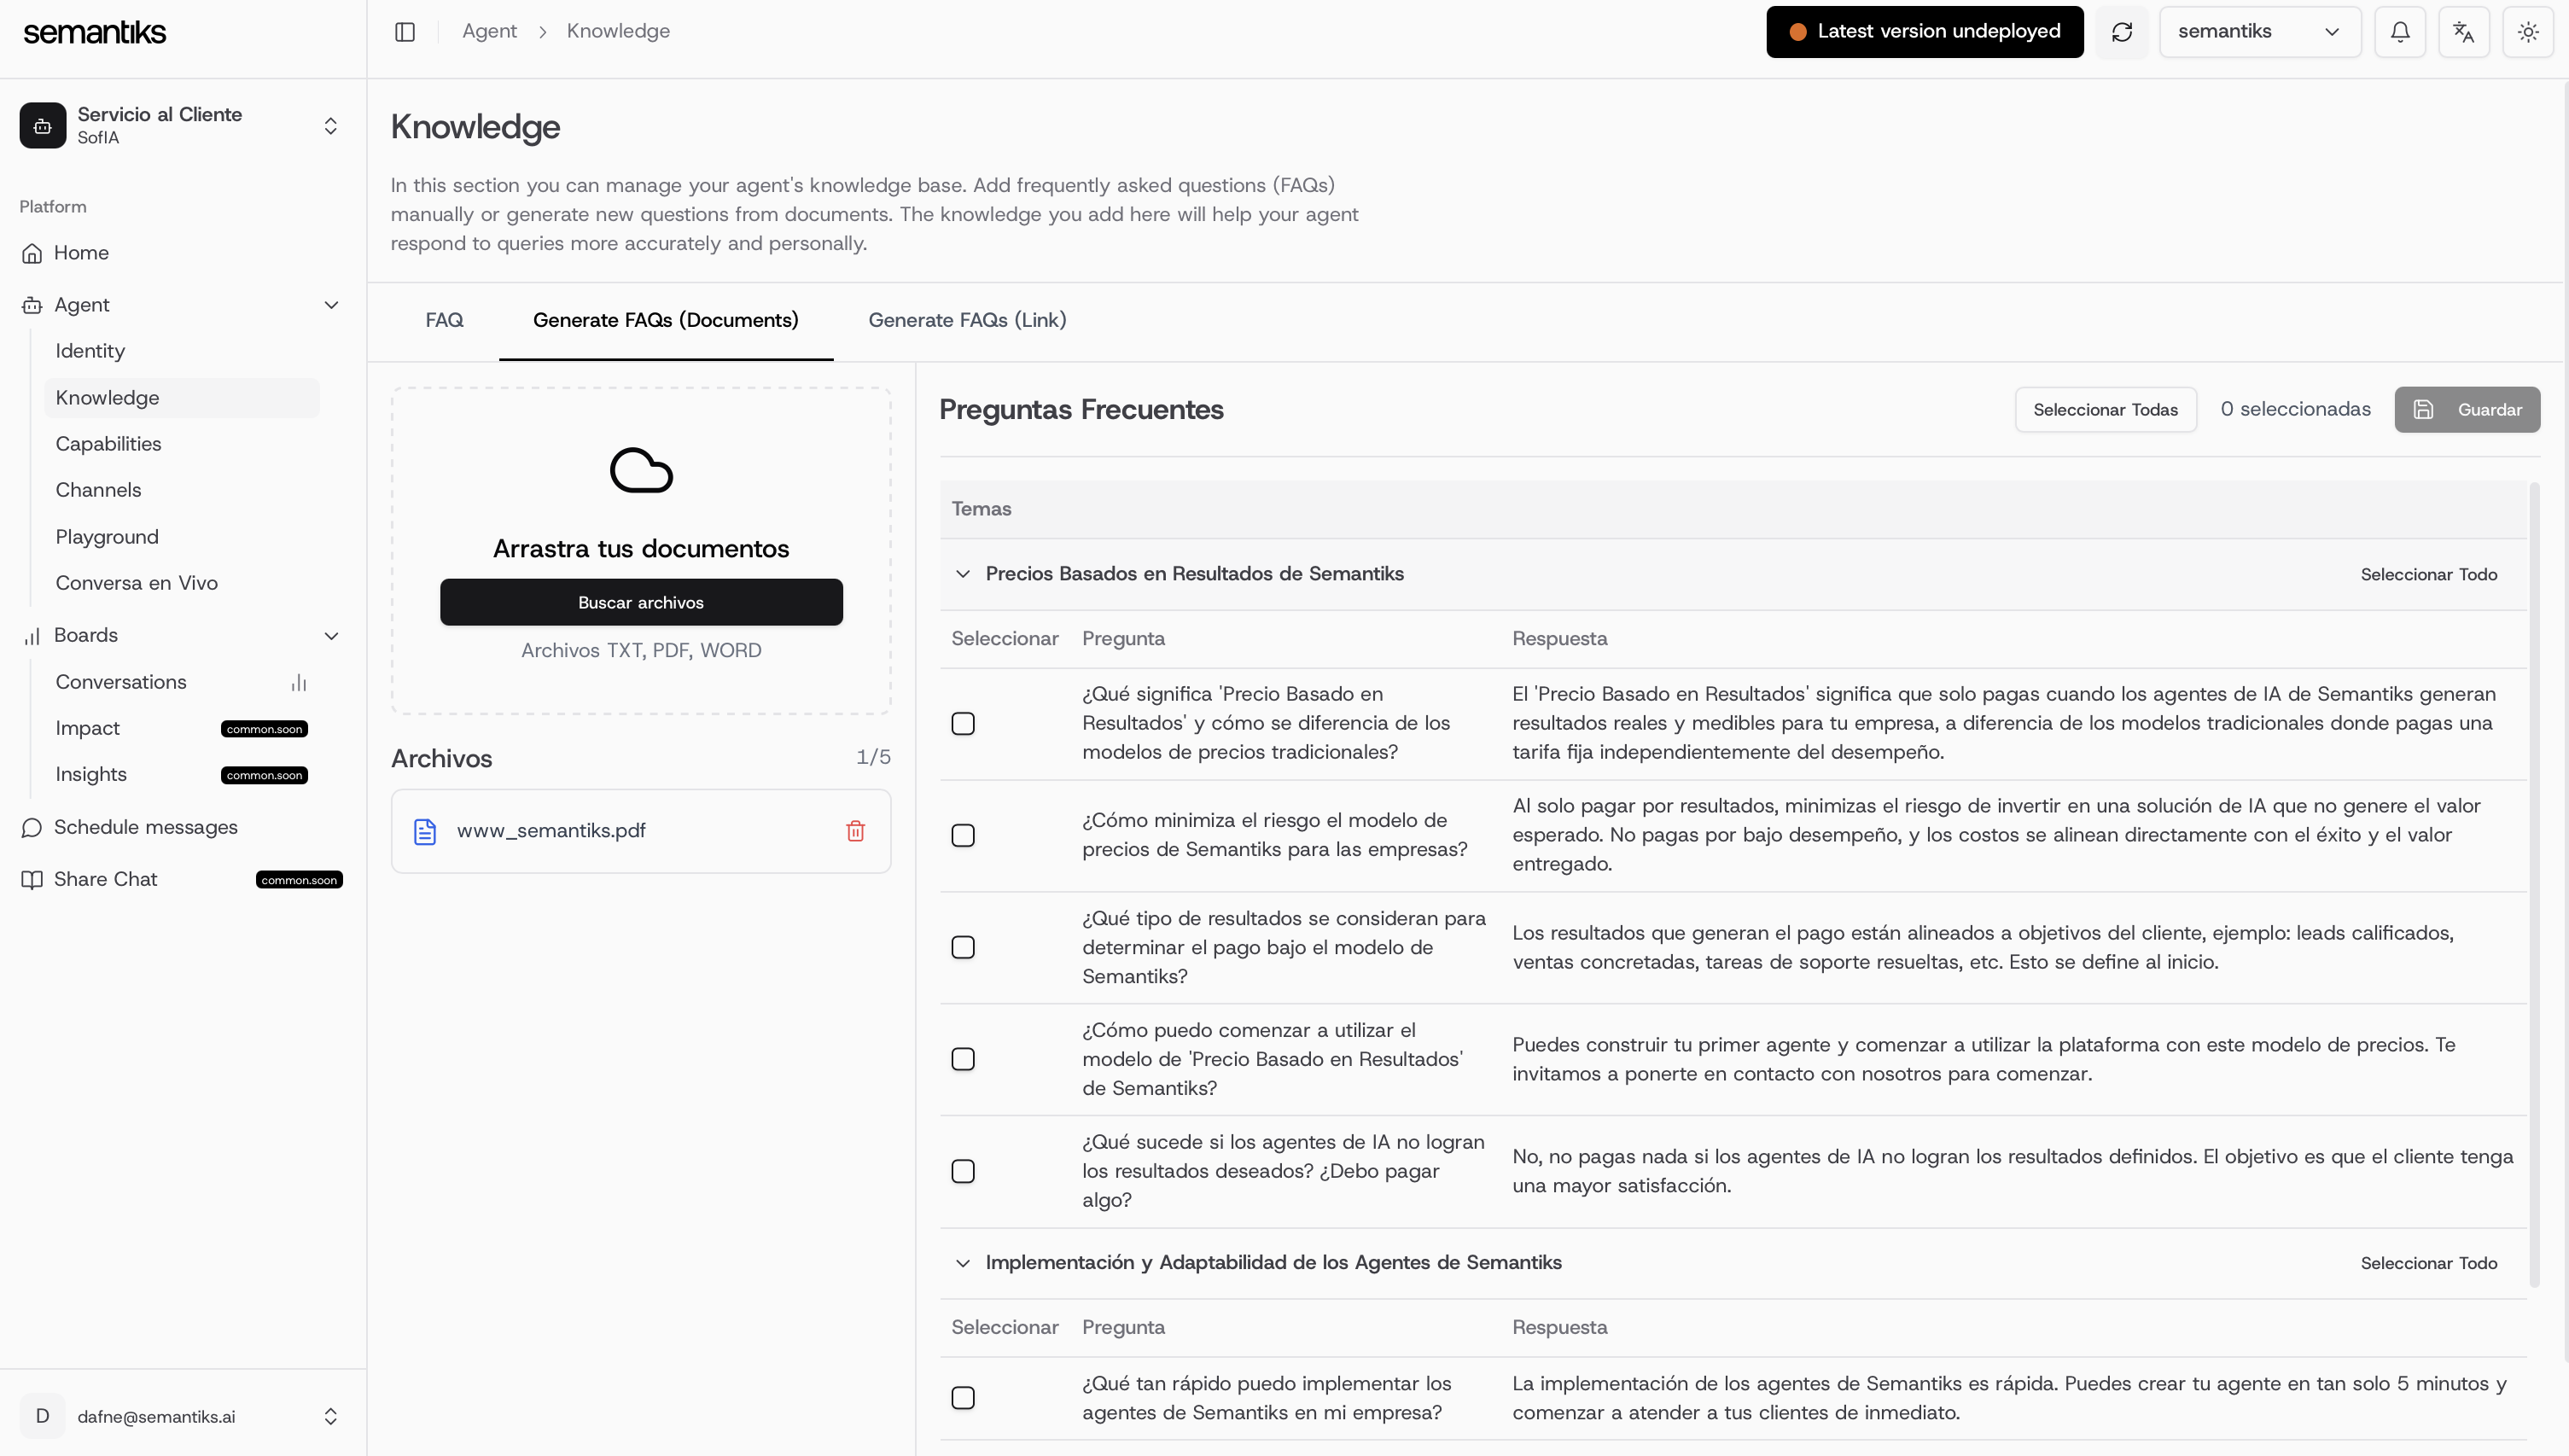
Always remember to double-check your FAQs, as they are the foundation of your agent’s knowledge and directly impact its performance.
FAQs Link Insert
Last but not least, there’s the FAQs from Link option.Simply paste a link, click Generate FAQs, and just like that your agent is ready to go!
DEPLOY YOUR AGENT CHANGES
This is a crucial step!You’ve just updated your agent’s knowledge base—but it’s not live for clients yet. After carefully reviewing all the updated FAQs, make sure to click the Deploy button at the top of the console.
This action publishes your changes and updates the agent’s knowledge across all communication channels automatically.
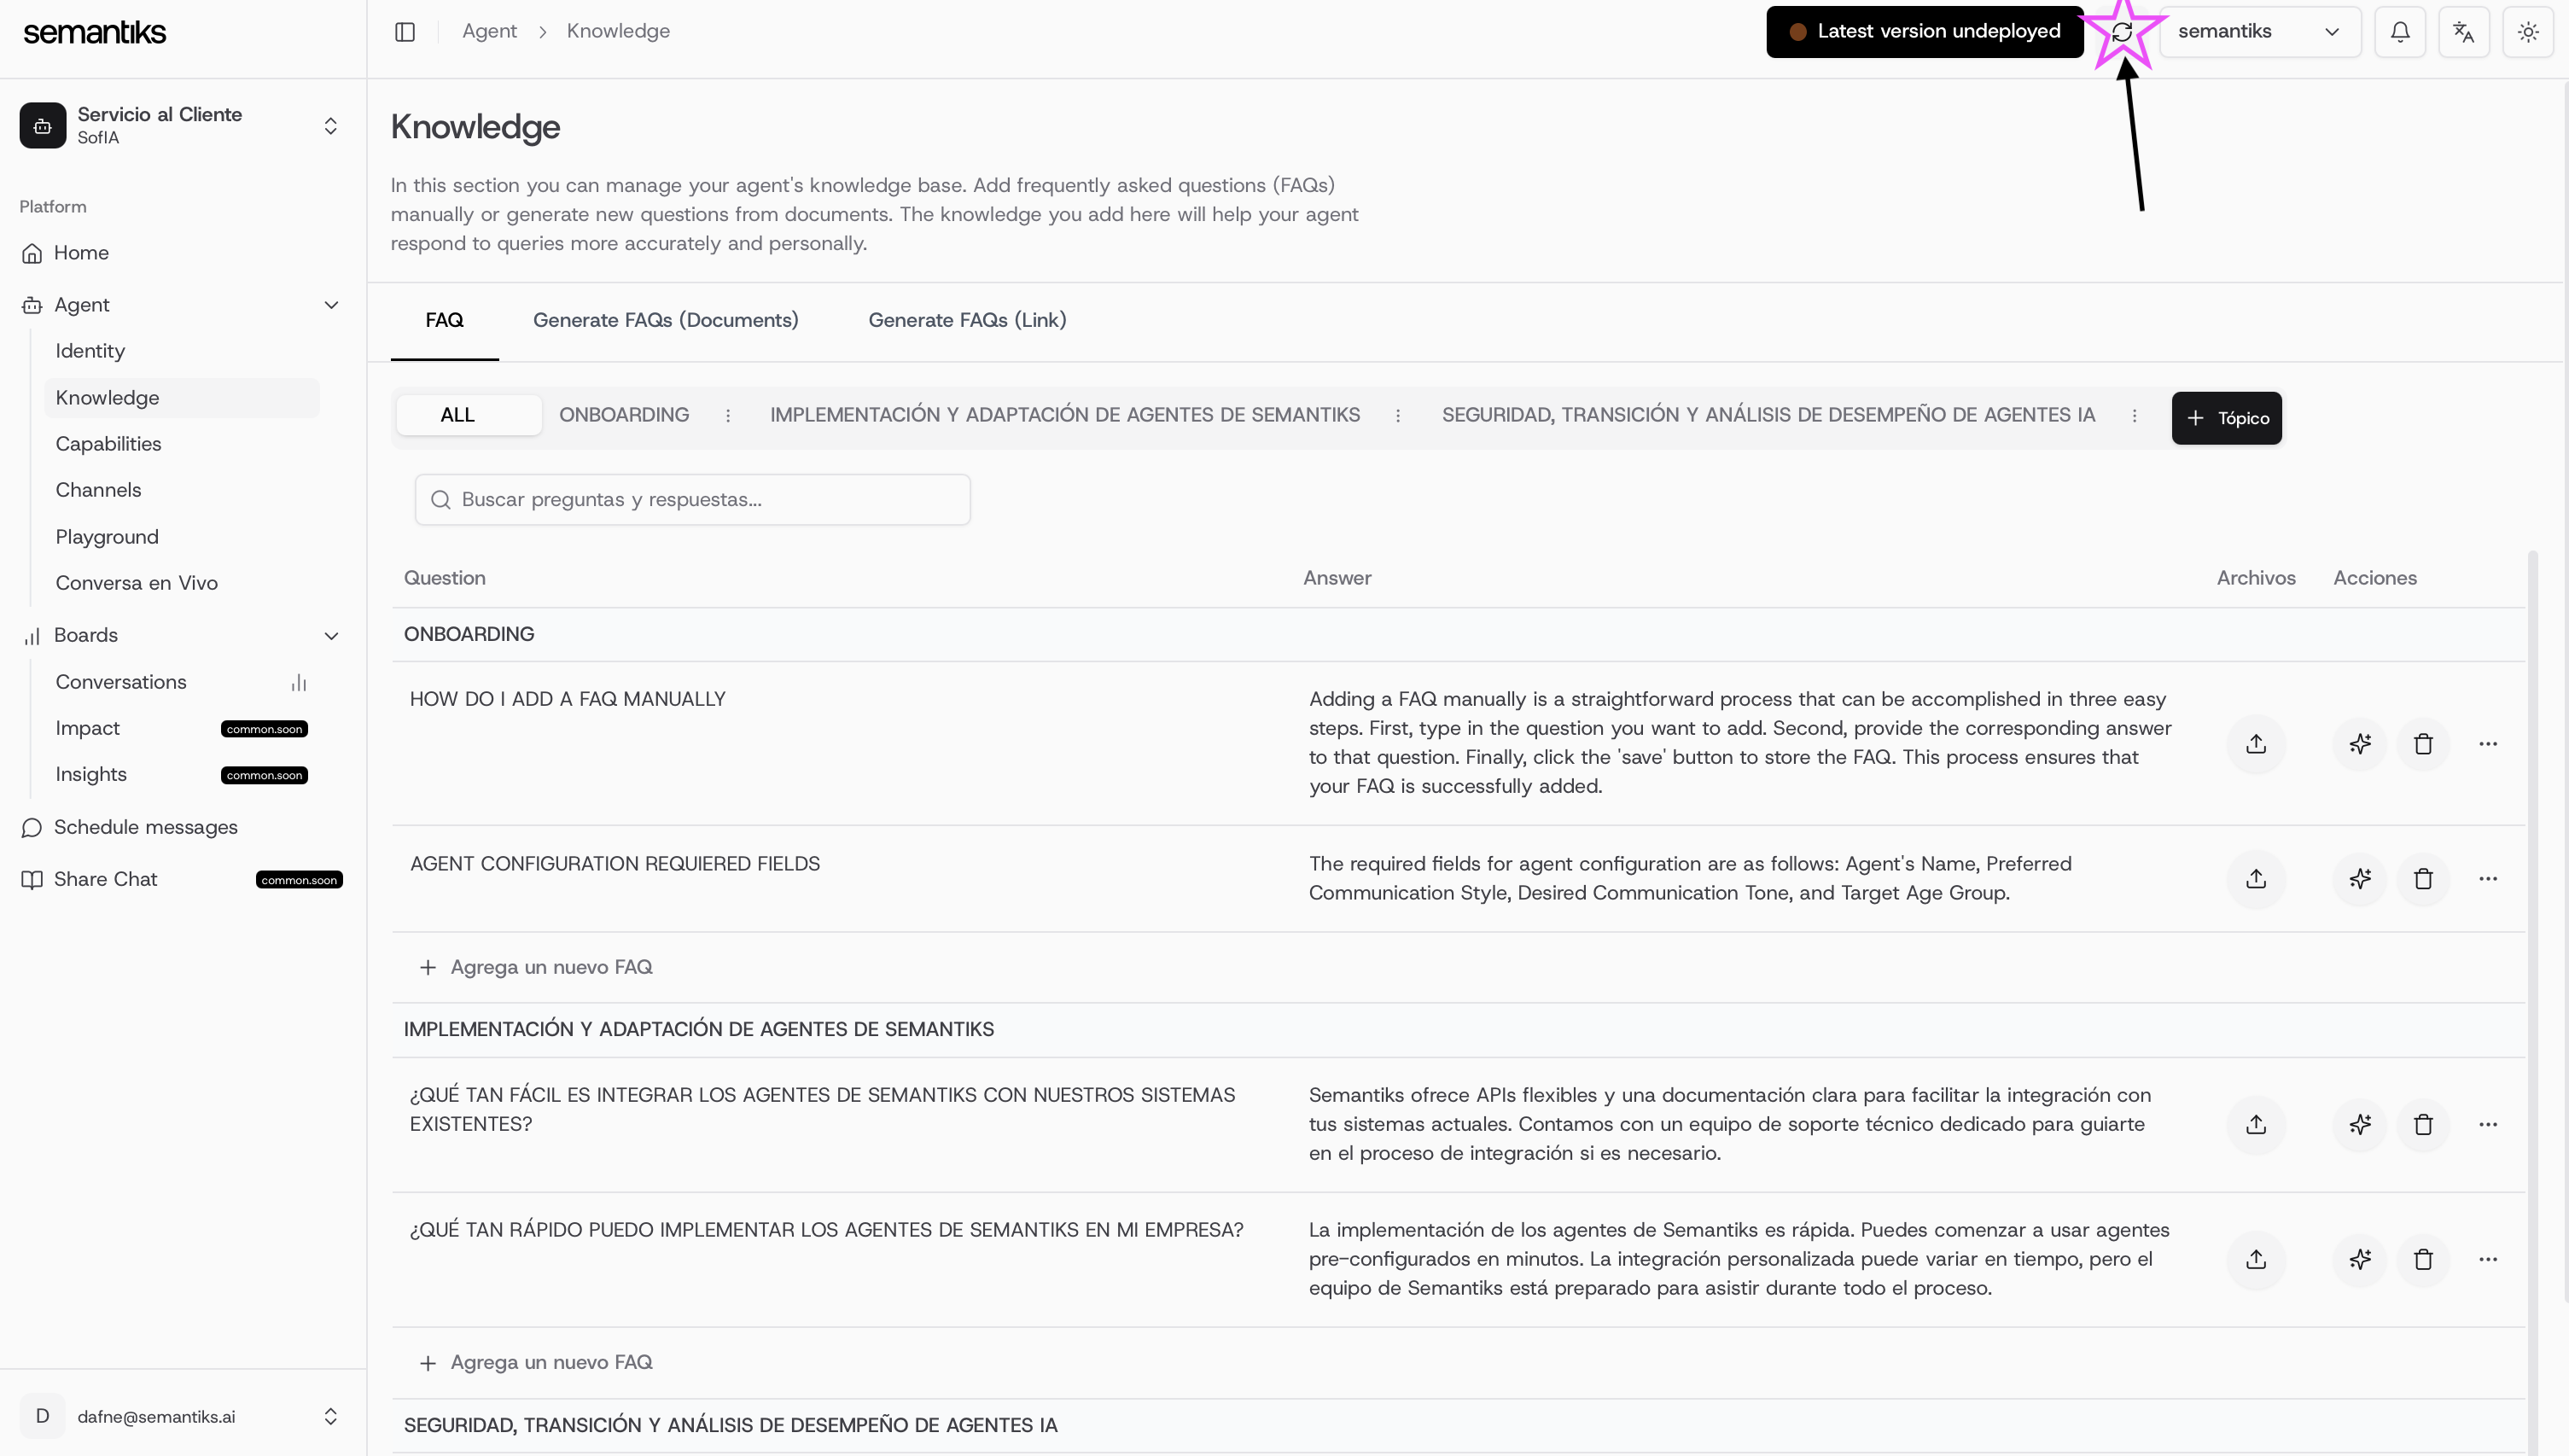
If your agent’s status is green and marked as Active — you’re all set!
Your agent has been successfully updated and is ready to assist with the latest knowledge.
